Changing WordPress fonts can significantly impact your website’s appearance and readability. It can either enhance user experiences and engagement or drive visitors away!
Whether you’re looking to inject personality into your blog, improve accessibility, or align your site’s typography with your brand identity, understanding how to change fonts in your WordPress website and do it properly is essential.

Here, with this detailed guide, we will walk you through four different methods you can use to present content on your website with the most attractive font styles. But not just that, we will also guide you on how you can do it in the most effective and easiest ways.
By the end of this article, you’ll have the knowledge to refresh your site’s look with new fonts, ensuring it stands out on the digital surface.
Understanding WordPress Fonts
Before diving into the “how-to,” it’s important to know that WordPress generally uses a default font that is set by the theme you have chosen for your site. These fonts are selected based on their versatility and readability across devices.
However, you might find that the default font does not align with the brand image that you are aiming for or the vibe you want for your site. That’s where custom font changes come into play that can help you implement different styles of font for your web-front. We are going to discuss the two most commonly used fonts in WordPress.
- Web Fonts: These are fonts widely available across different operating systems and browsers. They ensure a consistent look across different platforms but offer limited styling options. For example: Google Fonts. A popular choice for web designers, Google Fonts are free, easy to embed, and offer a wide range of styles and languages.
- Custom Fonts: These are fonts that you may purchase or download from various resources. They offer unique styling options but require proper licensing and optimization to ensure they don’t affect your site’s loading speed.
How to Change Fonts in Your WordPress site with 4 Easy Ways?
After creating a WordPress site, changing fonts in your website is one of the essential things to consider. If the fonts do not go with your brand tone, it will not ultimately bring the exact result that you are expecting.
1. Using a Plugin to Change Fonts in WordPress
With Essential Blocks, you can easily change fonts on your WordPress website. It is one of the easiest ways to change fonts on WordPress sites. You can easily access Google Fonts from the Essential Blocks dashboard to change fonts in WordPress sites. To change it just go to the settings of the plugin’s dashboard and turn on the Google fonts.
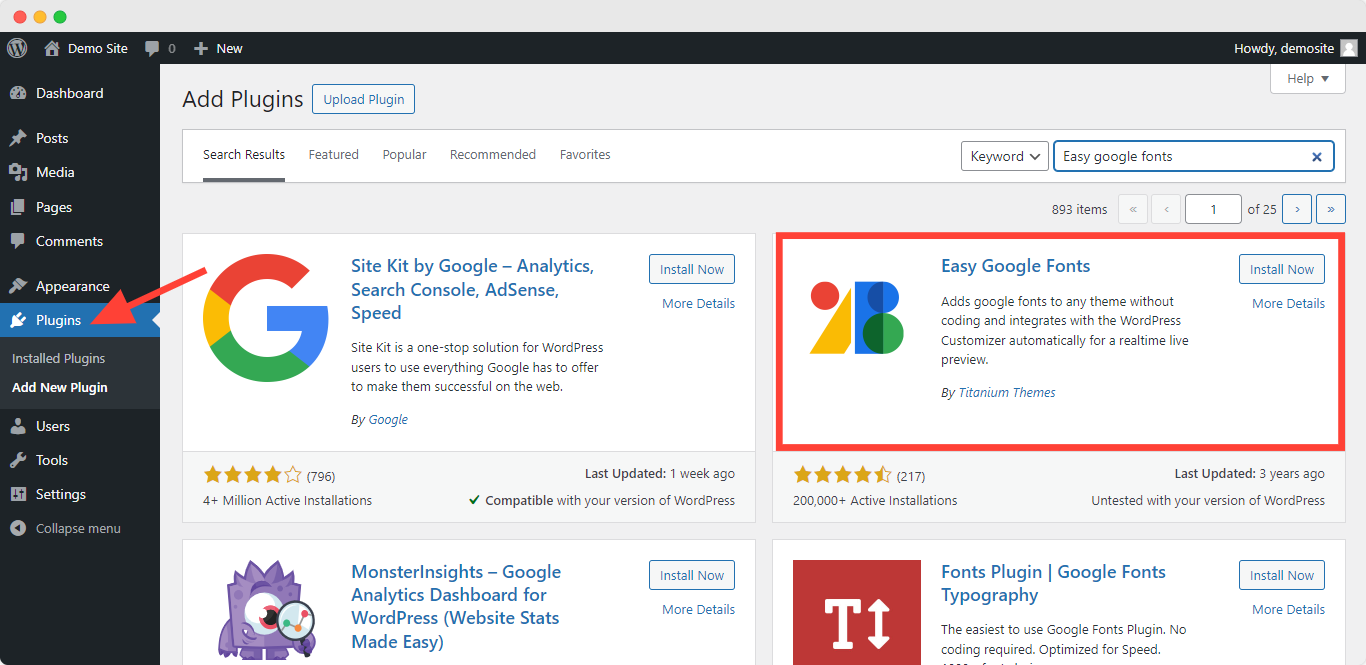
On the other hand, there are several types of plugins designed specifically to change fonts in your WordPress website. Plugins like Easy Google Fonts or you can use any plugin that allows you to access a wide range of fonts without needing to edit your theme’s files. It offers an extensive range of fonts to choose from. These plugins generally provide a settings panel where you can configure fonts for different elements of your site, such as headings, paragraphs, and navigation menus.
Here is how you can change fonts in your WordPress website:
Step 1: Install and activate the Easy Google Fonts plugin.
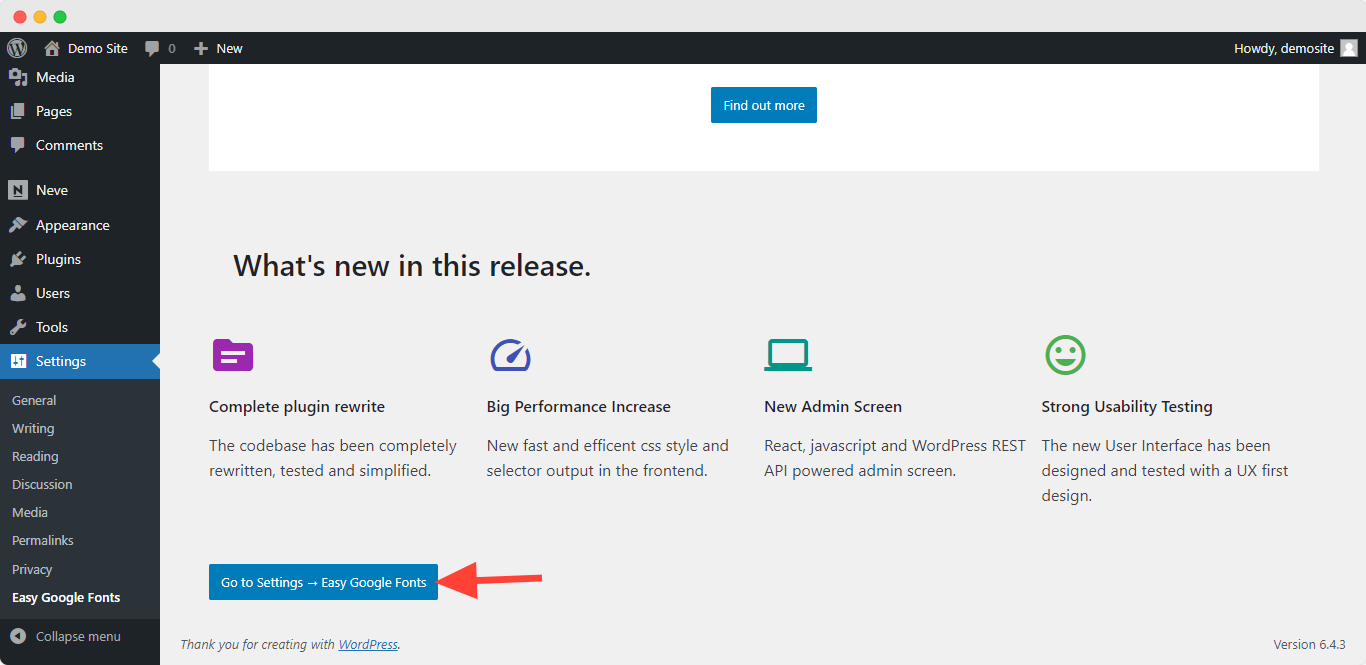
Step 2: Upon activation, you will see the Easy Google Fonts welcome screen in your WordPress dashboard. You can scroll down and click the ‘Go to Settings → Easy Google Fonts’ button.
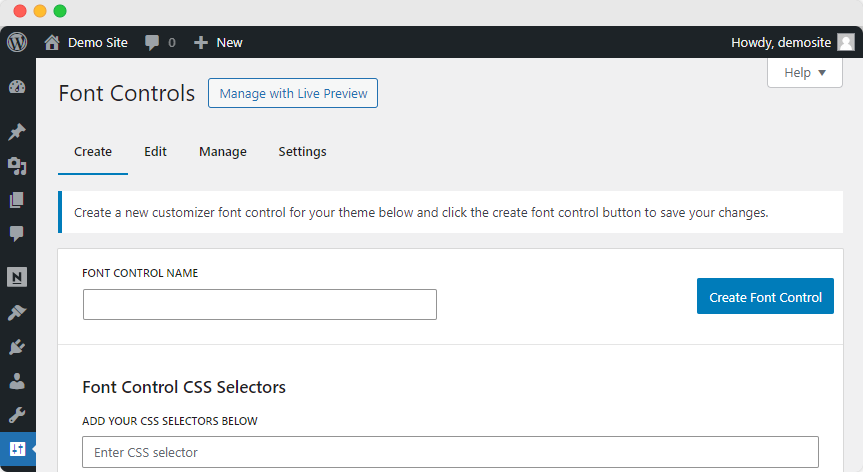
Step 3: On the next screen, you will see different plugin settings. Go ahead and click the ‘Manage with Live Preview’ button at the top.
Step 4: This will open the WordPress theme customizer, and you will be in the ‘Typography’ tab. From here you can change the fonts of your preferred areas.

Step 5: Preview your changes in the Customizer and publish them when you’re satisfied.
2. Using the Theme Customizer Options to Change Fonts in Your WordPress Website
The theme customizer is perhaps the most accessible tool to change fonts in your WordPress website. You can access this directly from the WordPress dashboard; it allows you to preview changes in real-time. Most modern WordPress themes include typography options here. It enables you to adjust fonts across your site without any coding knowledge.
Let’s see how you can use it:
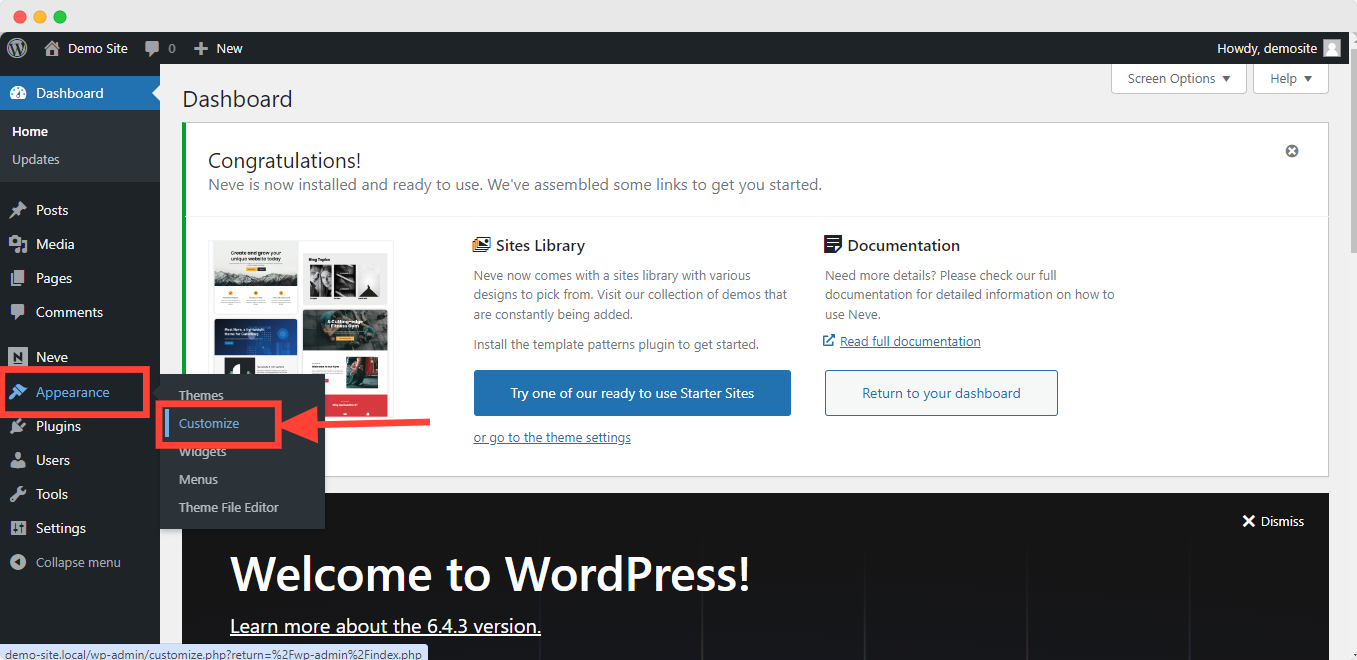
Step 1: Navigate to Appearance and go for Customize.
Step 2: Look for the Typography or Fonts section.

Step 3: Now, to change fonts in your WordPress website select the area such as the body text or headings.

Step 4: Choose your desired font from the dropdown menu. You can adjust the font size, weight, and color.
Step 5: Once you’re satisfied with your choices, click Publish to apply the changes.
3. Use WordPress Full Site Editing to Change Fonts in Your WordPress Website
Most full-site editor themes come preloaded with a few fonts to choose from. Themes such as Blockbase, Emulsion, Aino, and Twenty Twenty-Two give you the ability to change fonts in your WordPress website in the theme’s editor.
With the introduction of Full Site Editing (FSE) in WordPress, changing fonts across your entire website has become easier. FSE provides extensive control over site elements, including fonts. This feature allows you to edit templates and global styles directly, which makes it easier to apply consistent font settings across your site. To change fonts in your WordPress website using FSE for example, we’ll use the Twenty Twenty Two theme. To change fonts,
Step 1: Go to Appearance > Editor to access the Full Site Editor.
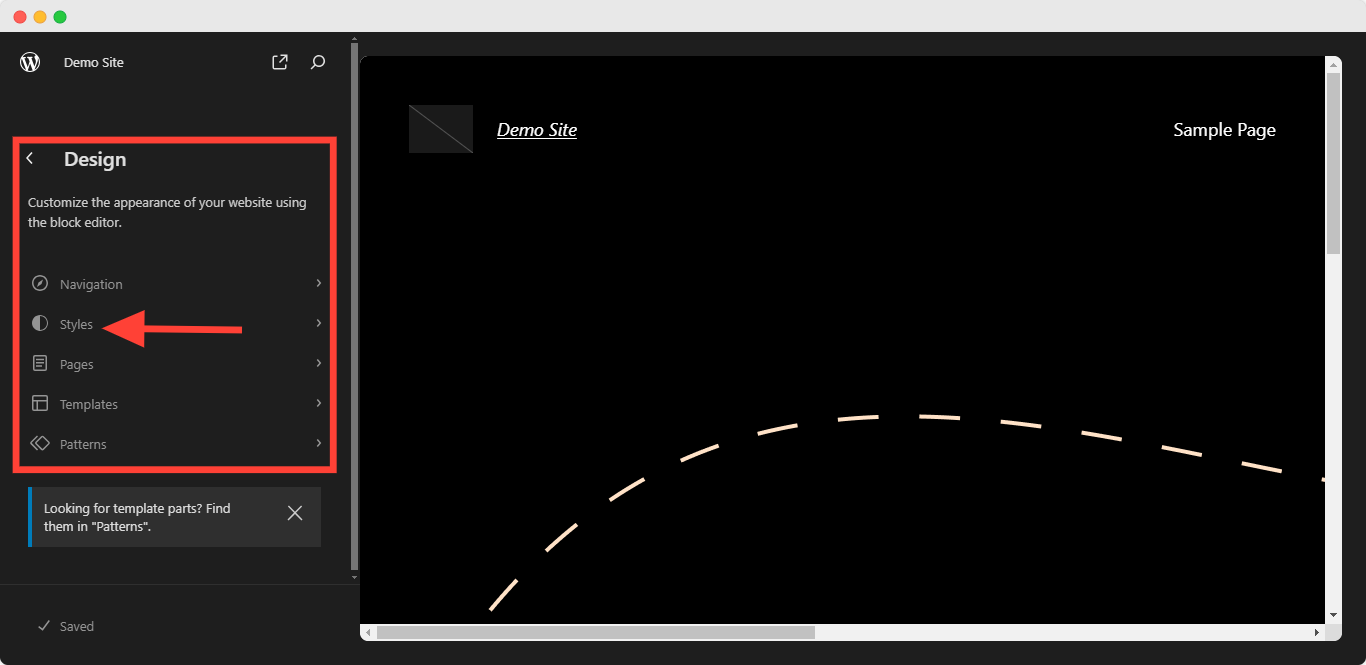
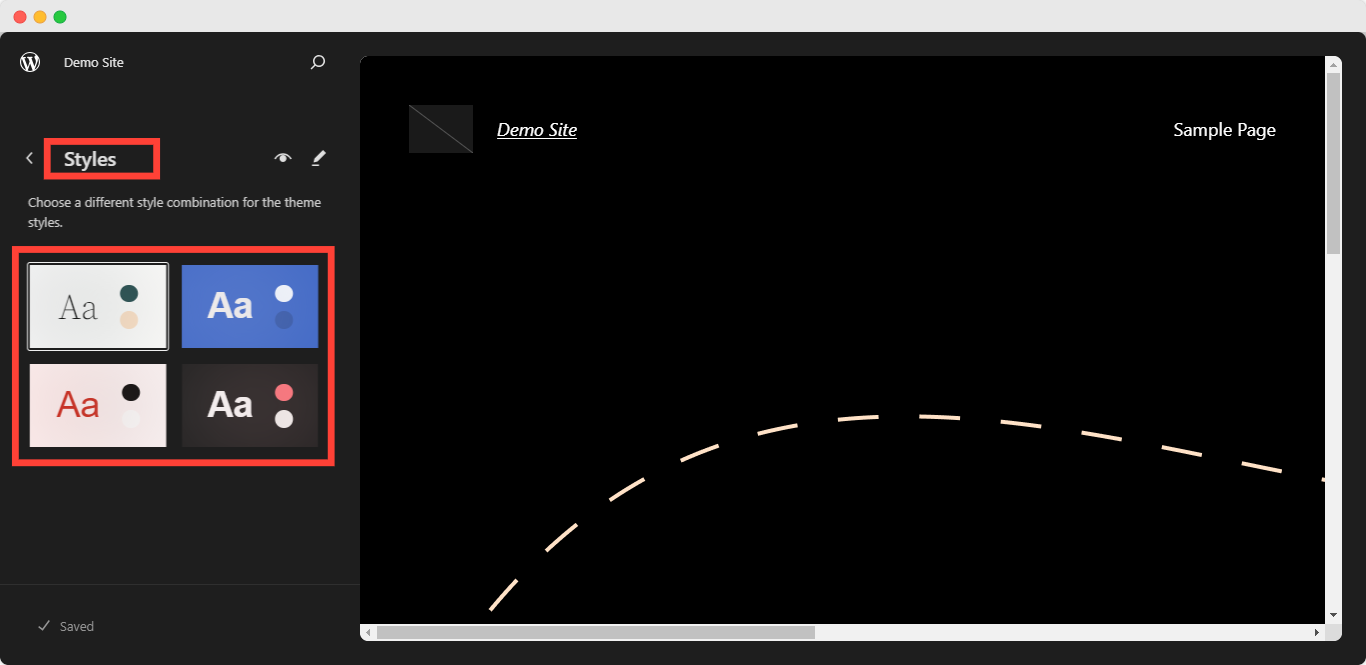
Step 2: Open the Styles panel on the top right.
Step 3: Navigate to the Typography section to find font options.
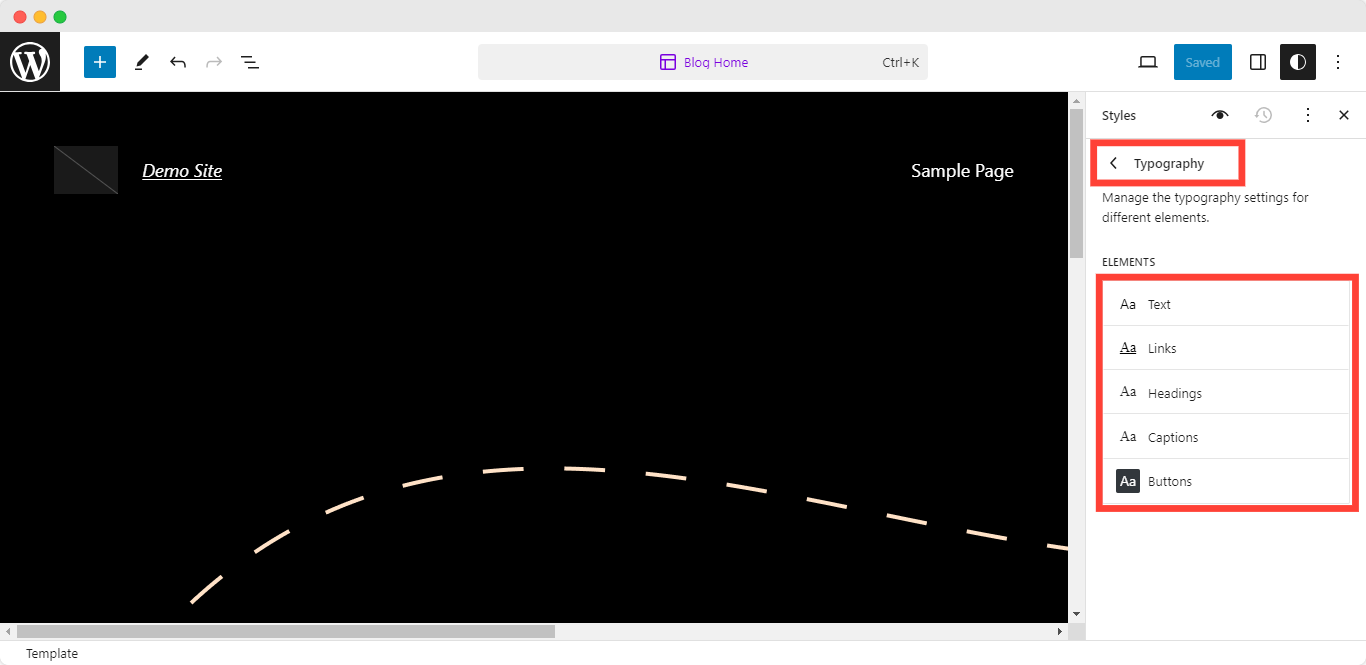
Step 4: Adjust the font settings as needed for different parts of your site, such as headings, paragraphs, and links.
Step 5: Save your changes to update the site’s fonts globally.
4. Changing WordPress Fonts with the Block Editor
The WordPress Block Editor, also known as Gutenberg. With this feature, WordPress introduces flexibility in content creation. It allows changes for individual block adjustments, including font sizes, styles, and families. This is particularly useful for posts and pages where you might want different font styles. To change fonts in the Block Editor:
Step 1: Select the Block you wish to modify.
Step 2: Look for the Typography settings in the right sidebar under the Block tab.
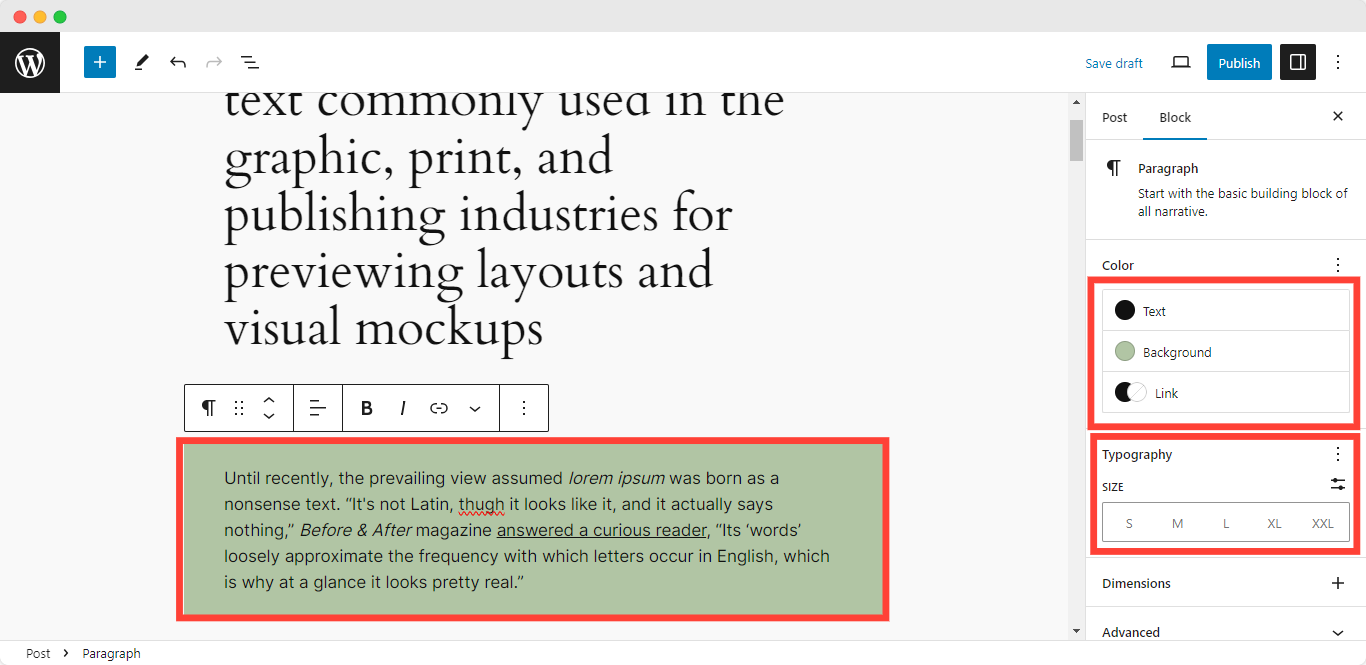
Step 3: Adjust the font size, family, and appearance as desired.
Step 4: Apply the changes and update or publish your content.
Bonus Ways: Editing the Theme’s CSS
For those who are comfortable with diving into code, editing your theme’s CSS provides the highest degree of customization to change fonts in your WordPress website. This method involves adding custom CSS rules that specify which fonts to use on different parts of your site.
Step-by-Step Process to Edit Theme’s CSS for Font Change
Step 1: Accessing Additional CSS
- Navigate to your WordPress dashboard.
- Go to Appearance > Customize.
- Find the Additional CSS section. This is where you can add your custom CSS without directly editing theme files, making it a safer option for customization.
Step 2: Writing CSS Rules for Font Change
- Within the Additional CSS box, you can write CSS rules to change fonts in your WordPress website. For instance, if you want to change the font of all body text, you could use:
body {

 font-family: 'Open Sans', sans-serif;

}- Similarly, to change the font for all headings (h1, h2, h3, etc.), you could use:
h1, h2, h3, h4, h5, h6 {

 font-family: 'Roboto', sans-serif;

}- Make sure to replace ‘Open Sans’ and ‘Roboto’ with the font you wish to use. You can find font families on font-providing services like Google Fonts.
Step 3: Using Google Fonts
- If the font you want to use is from Google Fonts, you first need to include it. Go to the Google Fonts website, select the font, and copy the embed code.
- You can add this link directly to your header.php file or, for a simpler method, incorporate it into your CSS with the @import directive at the top of your Additional CSS:
@import url
('https://fonts.googleapis.com/css?family=Roboto:400,700&display=swap');
Step 4: Apply changes
After importing or specifying the font family, apply it to the elements of your choice using the CSS font-family property as shown above.
Step 5: Preview and Publish
As you add or modify your CSS, you can preview the changes in real-time in the customizer. Once you are satisfied with how your fonts look, click Publish to apply the changed fonts on your WordPress site.
By following these steps, you can change the fonts on your WordPress site through CSS customization, which will help you give your site a fresh and unique appearance.
Things to Consider Before You change Web Fonts on a WordPress website
Changing web fonts in your WordPress website can significantly impact its appearance and readability. Here are some important considerations before you start this font-changing process:
1. Font Legibility: It is important to ensure that the font you choose is easy to read. If it’s not legible, it won’t serve its purpose effectively. You can test the font in various sizes, heading styles, colors, and font weights to get a real sense of how it will look across your site.
2. Consistency with Brand Style: When you are choosing the font, keeping your existing website design and brand style in mind can help you choose a font that should complement your brand identity, not send a conflicting message. Moreover, consistency in font usage contributes to a coordinated user experience.
3. Letter Appearance: Text sizes make a great impact on the appearance of the website. Some fonts may look great in headlines but lose clarity in body text. You should check the letters in both large and small sizes to understand better how it is going to look in real-time on the user screen. Ensure the font maintains its visual appeal across different contexts.
4. Font Formats: Fonts come in various formats. When adding custom fonts to your WordPress site, consider the following formats:
- TTF (True Type Fonts): Older format developed by Microsoft and Apple.
- WOFF 1.0 (Web Open Font Format): Broadly used for web pages and recommended by the W3C.
- WOFF 2.0 (Web Open Font Format): Better compression abilities; loads faster. The newest version was developed by Google. The best format to choose because of its smaller file size and better performance for loading on modern browsers.
Whenever you are making any changes to your fonts, prefer using WOFF 2.0 fonts for better performance.
5. Adding Fonts to Your Site: You can add custom fonts manually through the File Manager or use themes and plugins to simplify the process. Also, you can explore options like Google Fonts for a wide variety of font choices.
Remember, while enhancing your site’s aesthetics is essential, site speed is equally crucial. Opt for fonts that strike a balance between visual appeal and performance.
Change Fonts and Give Your WordPress Site a Better Look
Changing fonts in WordPress can transform your site’s look and feel, making it more attractive, readable, and aligned with your branding. You can choose any of the described ways to change fonts in Your WordPress website successfully and most efficiently. Remember to optimize your fonts for performance, choose styles that reflect your brand, and consider accessibility to ensure a positive user experience.
Whether you are a beginner or an expert, these 4 easy ways to change fonts in your WordPress site can definitely help you out. You’re now ready to change fonts in WordPress and enhance your site’s look.
Did you find this article on these ways to change fonts in your WordPress website useful? Don’t keep them to yourself – share them with your friends and family! Also, make sure to subscribe to our blog for your regular dose of expert tips and join our Facebook community to stay updated.