You found a free Elementor template that looks great in the demo. You install it, open it in the editor and suddenly it feels like a stranger’s house. The colors are wrong. The fonts do not match your brand. The layout feels a bit off. Sound familiar?
Good news: you do not need a design degree or a big budget to fix that. Elementor gives you all the flexibility to turn a generic template into a page that actually looks like yours.
This guide walks you through the entire process, from picking the right template to polishing the final details before you publish. And today, in this tutorial guide, we will use free templates from Templately and show you how you can customize free Elementor templates for professional-looking pages.
Too Long, Did Not Read?
Customizing a free Elementor template does not have to be overwhelming. Follow these six steps in order, and you will have a polished, on-brand page ready to publish, without touching a single line of code. Here is a quick glimpse:
| Step | What To Do | Why It Matters |
| 1 | Choose the right template | Sets the foundation that matches your goal and niche |
| 2 | Set up global styles (colors, fonts) | Keeps your design consistent and on-brand |
| 3 | Customize layouts & sections | Aligns the structure with your content and flow |
| 4 | Replace placeholder content | Makes the page relevant, authentic and engaging |
| 5 | Optimize for mobile | Ensures a smooth experience across all devices |
| 6 | Add final touches (SEO, spacing, visuals) | Enhances professionalism and improves visibility |
How to Choose the Right Free Elementor Template
Sometimes, people assume “free” means “low quality.” That is not always true. Elementor’s own template library contains hundreds of professionally designed layouts built by real designers.
Third-party platforms or dedicated WordPress template clouds like Templately also offer high-quality, free and customizable Elementor templates. The designs are solid. What they require is personalization and that is exactly what you will add. The key is knowing which parts to change and in what order.
Not all templates are equally easy to customize. Picking the right one saves you hours of frustration later. Here is how to pick the right Elementor template.
Match the template’s structure to your content: If you are building a service page with three feature sections, choose a template that already has that structure. Removing sections is easier than building new ones from scratch, but rebuilding the entire layout defeats the purpose.
Look for templates with minimal decorative complexity: Templates with lots of custom shapes, layered backgrounds and intricate animations are harder to adapt. Clean, grid-based layouts are far more flexible.
Check the widget count: Open the template in the editor and look at how many custom Elementor Pro widgets it uses. If you only have the free version of Elementor, templates that rely heavily on Pro-only widgets will break. Stick to templates that use basic widgets: headings, text editors, images, buttons, and dividers.
Where to Find Free Elementor Templates?
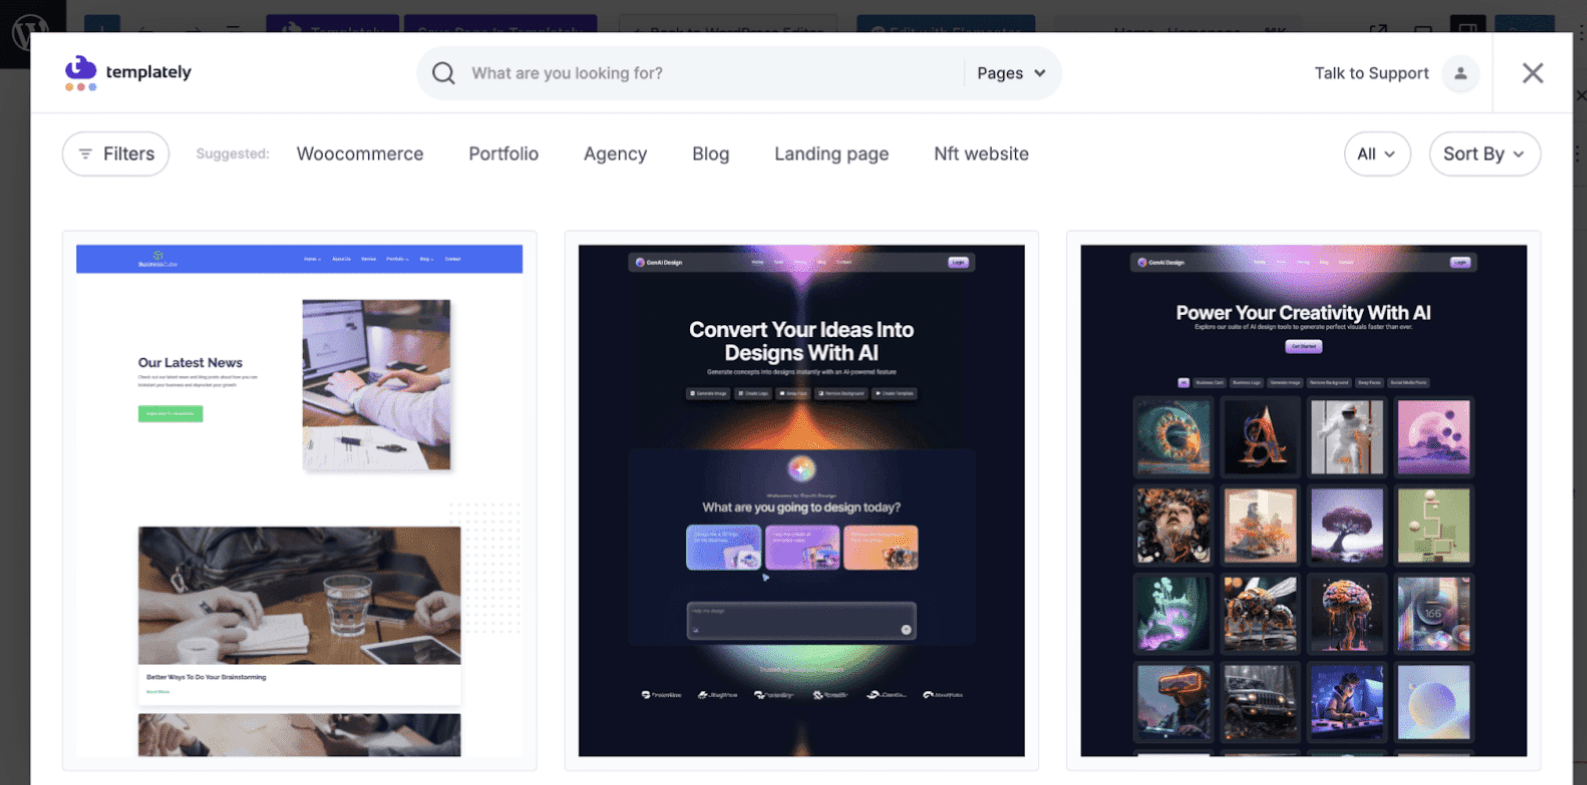
There are several places to find free Elementor templates online. For this guide, we will be working with Templately and here is why it makes sense as our starting point.
Templately is one of the AI-powered WordPress template clouds available today. It has a library of 3,000+ Elementor templates spanning versatile niches, from business and portfolio to eCommerce and more. A significant portion of these templates is completely free. Because Templately is built exclusively for WordPress and designed with flexible customization in mind, it is a practical and reliable choice for following along with this tutorial.
Step-by-Step Guide to Customize Free Elementor Templates
Now that you know how to choose the right template and where to find one, it is time to dive deeper and learn how you can customize a free Elementor template. Follow the steps below:
Step 1: Set Up Your Global Colors And Fonts First
This is the most impactful step when customizing free website templates and most beginners skip it entirely.
Setting Global Colors:
Templately’s Global Color Control feature allows you to customize the global color of your entire WordPress site effortlessly during the Full Site Import process and from the settings panel as well. This feature allows you to define a cohesive color palette for your website, ensuring your design matches your brand identity before you even start working on the finer details.
To set up global colors when importing the template, follow these steps.
- Log in to your Templately account. Check this documentation if needed to create a new account.
? 2")
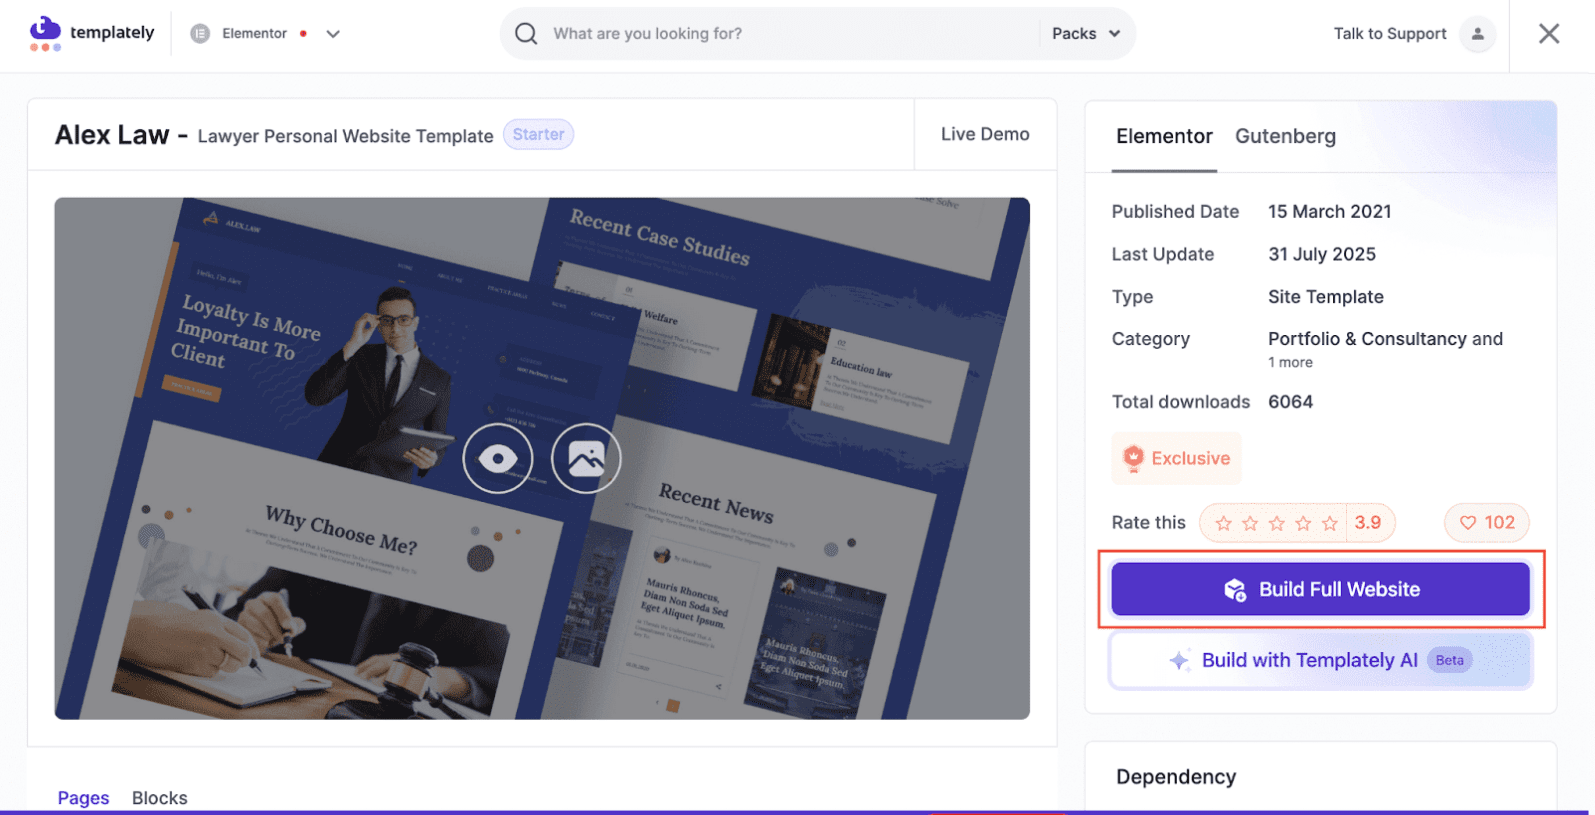
- You will see the Templately dashboard. Now, choose any of the free templates or template packs you prefer
- After selecting, click on ‘Build Full Website’ as shown below. A pop-up window will appear. There, you can add the ‘Site Title’, ‘Site Tagline’ and upload a logo. Once you are done, just click the ‘Next’ button.
- Now, you will see the global color control panel. Here, you will find options to set up your full website’s color scheme.
- Set the ‘Primary’ color, which is used for buttons, links and key elements.
- Secondary Color is used for supporting elements.
- Choose colors from the palette or input a hex code and preview the changes in real-time.

Setting Global Fonts:
Similarly, Templately allows you to customize global typography for your entire site easily. This is a useful feature designed to simplify typography control across your WordPress site. This reduces the hassle of individually adjusting fonts for every element.
After configuring color controls, you move to the typography control panel. You can define site-wide typography settings like font styles, sizes and spacing before importing a template pack.
Here, you will find options to customize typographies like System Font, Headings and custom fonts to define font families, sizes, weights and other properties for key elements such as text, links, buttons and headings of the entire website.
Follow these steps below to customize typography.
- In the ‘System Font’, click on the edit icon right beside the ‘Text’ option to adjust its Font family, Size, Line, Letter, Weight, Transform and Decoration as you want. Similarly, customize fonts for Link and Button options.
- In the ‘Headings’ section, you can choose from different heading styles separately. Click on the edit icon and configure the Fonts family, Size, Line and other options as needed. Similarly, customize all the headings to make their appearance aligned to your needs.
- Click the ‘Next’ button to save your settings and proceed with the import by clicking on the ‘Install and Proceed’ button. This is how your configured global color settings will be applied all over the site from the beginning.
Alternatively, to configure colors, from your dashboard, go to the ‘Settings’ tab under Templately. Here, you will get multiple style configuration options for Color and Typography.

Once your global styles are set, go back to your template. You will likely see a big improvement already, just from the color and font swap.
Step 2: Edit the Layout And Section Structure
Now open the template in the Elementor editor. Click on any section and on the left, the settings panel will appear. Now you can edit sections according to your needs.
💡 Pro Tip:
👉 Adjusting section padding and spacing is one of the fastest ways to make a template feel custom. Increasing the vertical padding on hero sections and reducing it on dense content sections immediately improves the visual rhythm. Here is a simple spacing system to follow:
- Hero sections: 120px top and bottom padding
- Standard content sections: 80px top and bottom
- Compact sections (like feature icon rows): 60px top and bottom
👉 Changing section backgrounds is equally impactful. Most templates use solid white or light gray backgrounds. Experiment with subtle gradients, light texture overlays, or alternating light and slightly off-white sections. This adds depth without making the page feel busy.
To change a section background, click the section handle, go to the Style tab and look for Background Type. You can choose solid color, gradient, image, or video. For a professional look, subtle gradients work better than stock photos as section backgrounds.
👉 Reordering sections is straightforward in Elementor. Hover over the section, click the six-dot handle and drag it up or down. Reorder your sections so the most important information appears early. Users scroll less than you think.
Step 3: Update the Website Copy/Content
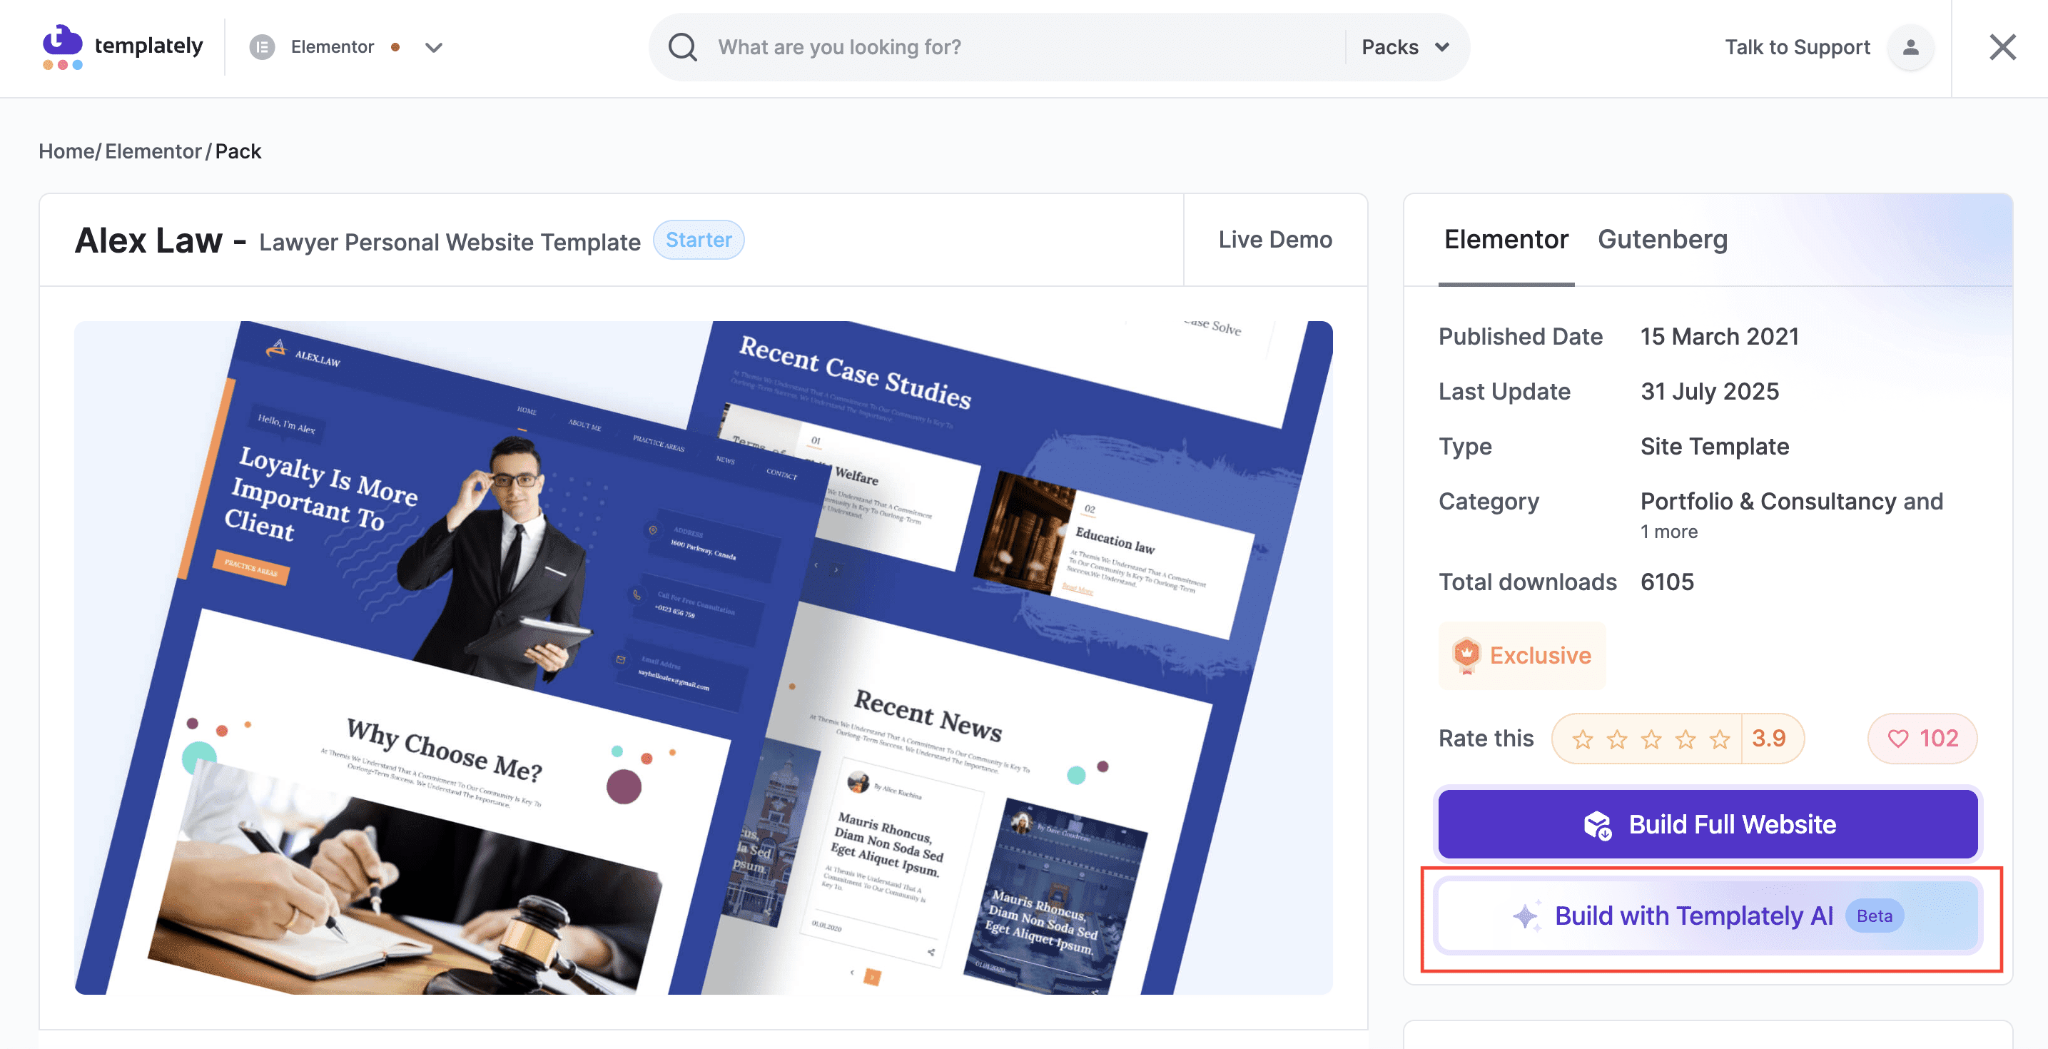
Templates come with dummy text and stock images. This step is obvious, but easy to rush and rushing it is where pages start to look unprofessional. With Templately AI, it becomes very easy to customize content and replace images according to your needs.
After selecting the template from the right sidebar, you will find two options: ‘Build Full Website’ and ‘Build with Templately AI’.
Click on ‘Build with Templately AI’ to generate your website content with AI.
Now, you need to fill in some of the information to better generate the content. After clicking on the button to build with AI, you will find a chat window open, asking for some information.
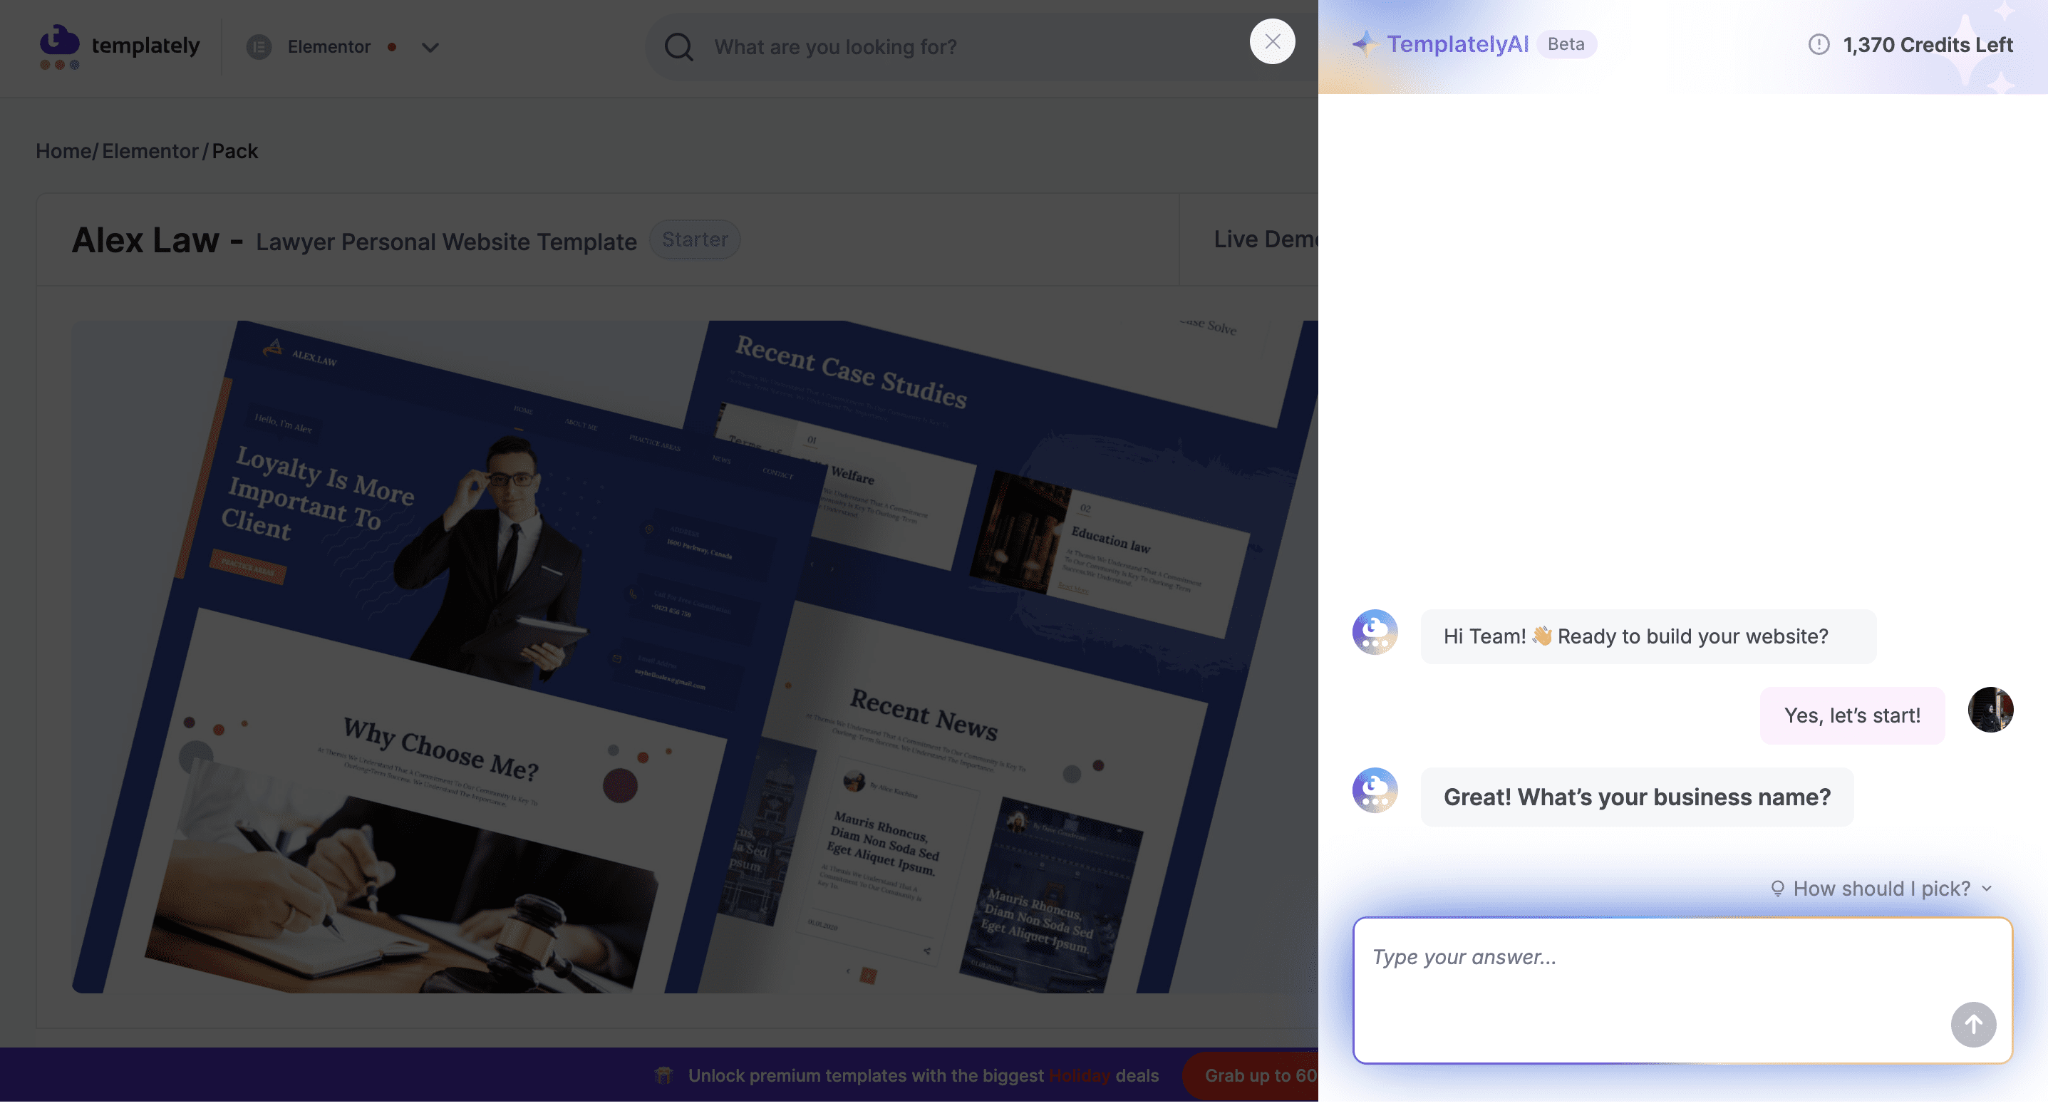
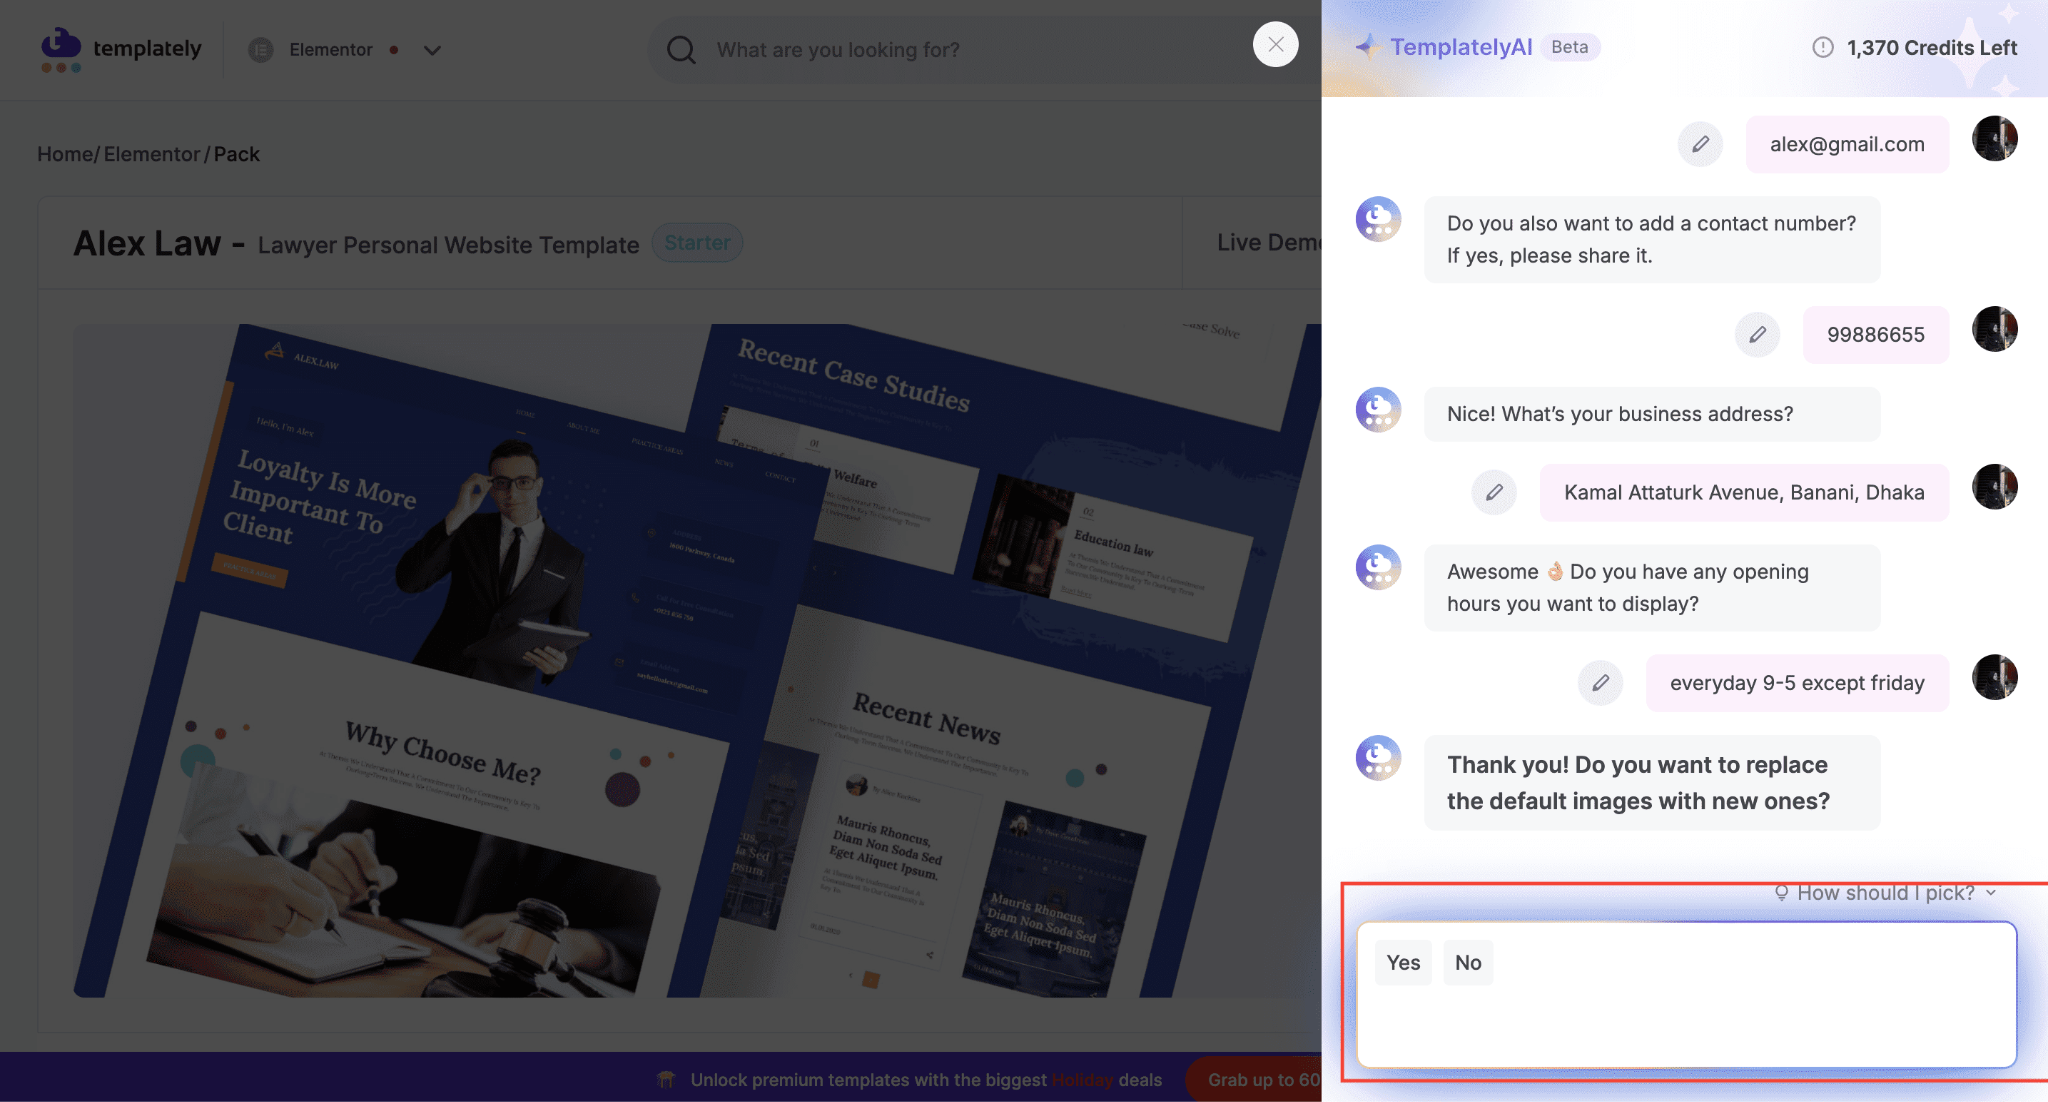
After that, click on ‘Let’s get started’ to start giving the information for your website. Here, the AI will ask some questions to generate content based on the answers you provide. So, give information accordingly related to your business name, industry, business description, opening hours, etc
After answering the questions, you will receive a confirmation text to generate content on the website based on the information you provided.
Step 4: Replace Placeholder Images
If you want to replace the images from the template and want to add customized images, you can do that. With Templately AI, you can also replace images. After sharing your business details, you will be asked whether you want to replace images. To change images, click on the ‘Yes’ button to agree to replace images.
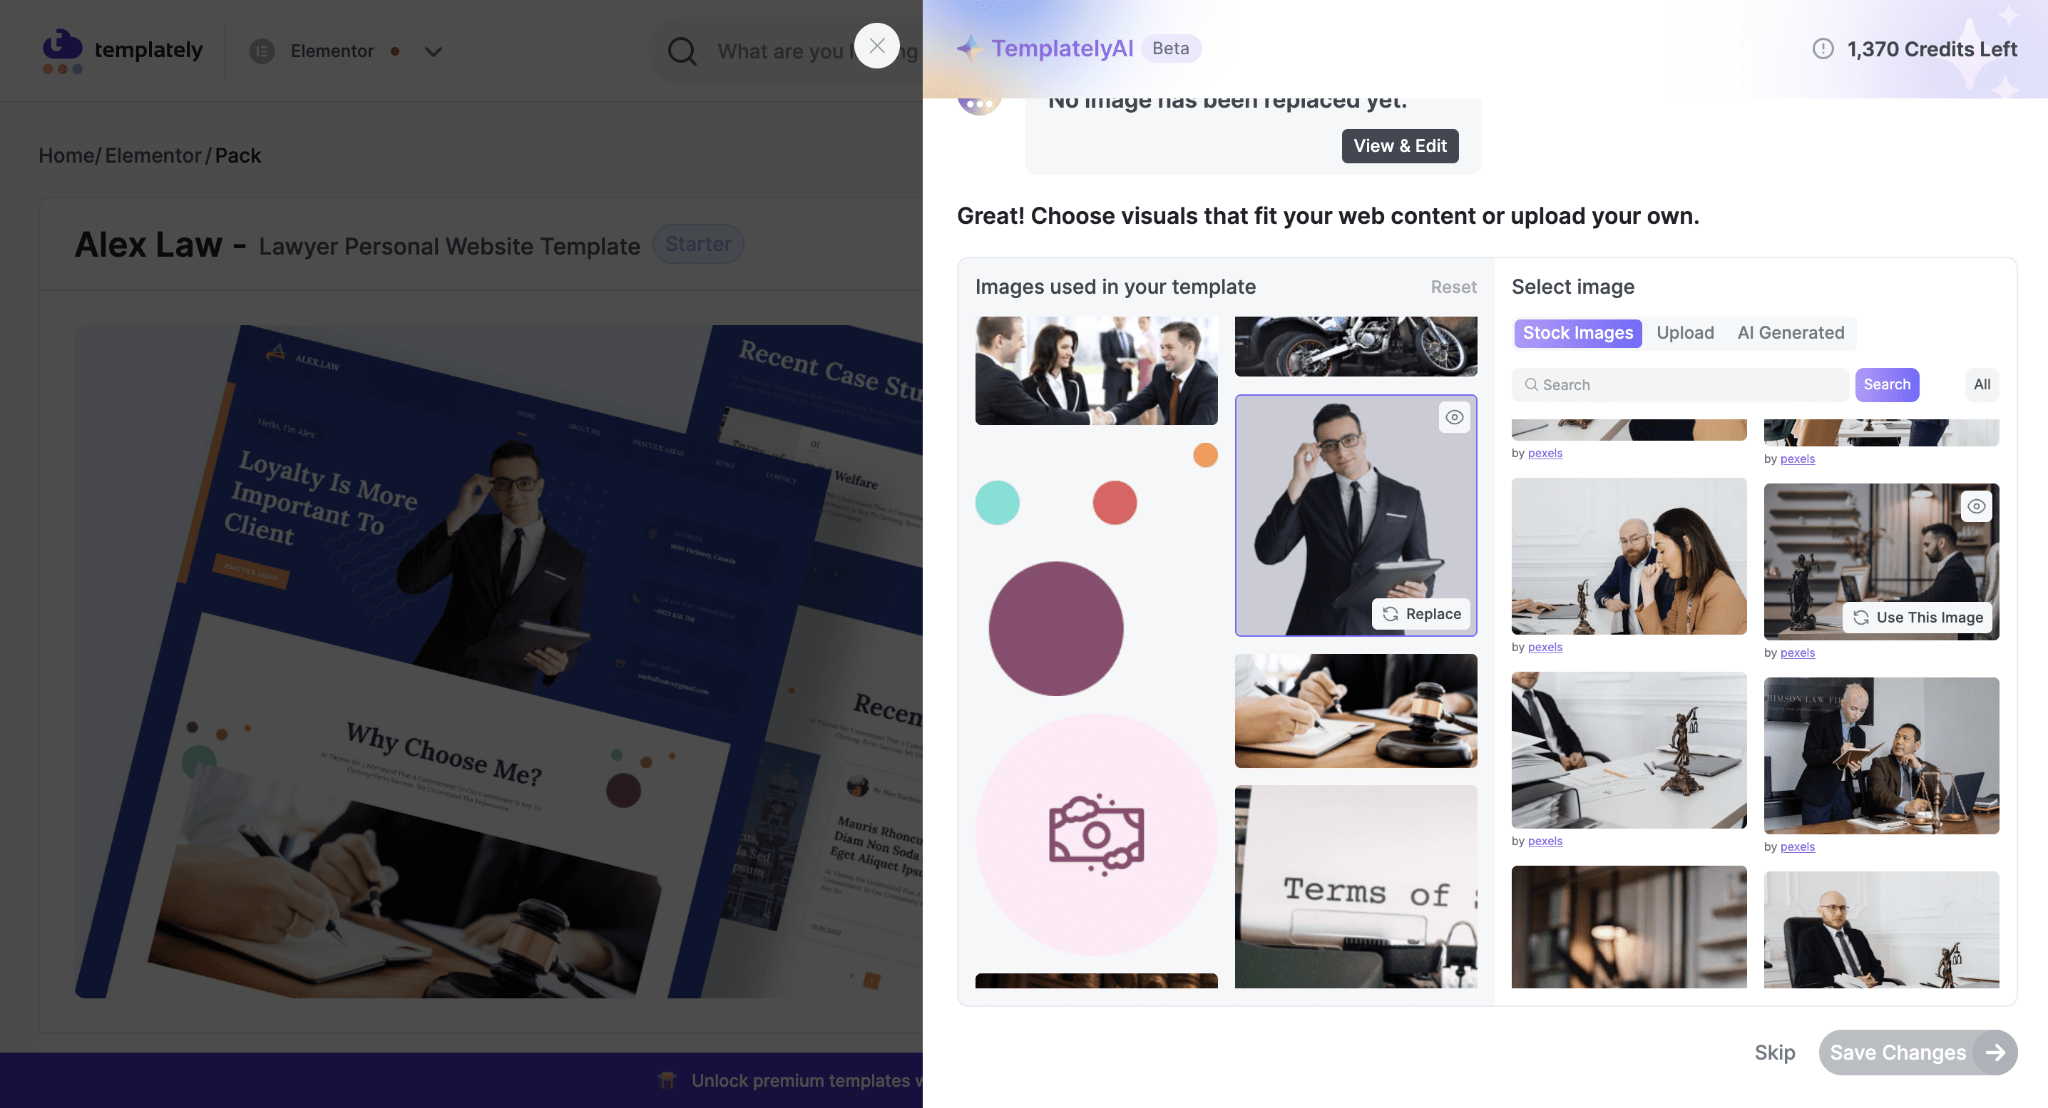
After that, you will find an option to change images. From the options, select the image you want to replace. Then, you can choose from stock photos or upload them from your files. Select the images you want to replace. Click ‘Save Changes’ and after importing the full site, you will see that the images will be replaced with the ones you have chosen.
Once you click on ‘Generate and Proceed’ to generate full content and replace images on your website with AI, you will see the following screen.

Finally, after installing and making your website live, you can see that the content is generated based on the information you provided on Templately AI, with replaced placeholder images.
After global styles and content replacement, you will still find elements that need individual attention like button, headings, icons, etc. This is normal. Here are a few things to keep in mind while updating website content:
👉 Buttons: When you are customizing the copy, make sure that you update the buttons. Check every call-to-action button. Replace the placeholder text with specific, action-oriented copy. Use CTAs that tell the user exactly what happens next, such as “See Our Services,” “Book a Free Call,” or “Download the Guide,” etc. Also, update the button link. Placeholder buttons often link to “#” (nowhere). A broken link on a published page looks careless.
Beyond the text, check button style consistency. If your brand uses rounded buttons, apply a border radius of 30px or higher across all buttons. If your brand is more corporate and angular, keep the radius at 4px or lower. Consistency matters more than the specific choice.
👉 Headings: Check that all headings follow a clear visual hierarchy. H1 should be the largest and most prominent. H2 comes next for section titles. H3 is for subsections or card headings. Make sure they match logically.
👉 Icons: Many templates use generic icon packs. If the default icons do not suit your content, swap them out. An icon should reinforce the meaning of the text next to it, not just fill space.
👉 Testimonials and reviews: If the template includes a testimonials section, replace the placeholder names and quotes with real ones. If you do not have testimonials yet, either remove the section or replace it with another trust signal, such as a client logo strip or a simple statistics row.
Step 5: Optimize the Template for Mobile Devices
According to Statcounter’s global stats, mobile devices account for approximately 60% of global web traffic. Ignoring mobile optimization could cost you more than half of your visitors.
Changes you make on the desktop view do not automatically look good on mobile. You need to check. However, the good news is that all the free templates of Templately are designed following the mobile-optimization principles. So, they look good on any device you use,
At the top of the Elementor editor, you will see responsive mode icons: desktop, tablet and mobile. Click the phone icon to switch to mobile preview. Check every section from top to bottom.
Common mobile problems in free web templates and how to fix them:
- Text that is too large on mobile: Click the heading or text widget, switch to mobile mode, and reduce the font size for that breakpoint. Elementor lets you set different values per device.
- Sections with too much padding on mobile: 120px vertical padding looks fine on desktop, but wastes scroll space on mobile. Reduce it to 60px or 40px in mobile view.
- Columns that do not stack properly: By default, Elementor stacks columns on mobile. But sometimes the stacking order feels wrong. You can reorder columns specifically for mobile by editing the column reverse settings.
- Images that appear cropped or stretched: Check your image size settings. For mobile, “auto” height often works better than a fixed pixel height.
After checking the mobile, also check the tablet breakpoint. Tablets sit between the two and often need their own adjustments.
Step 6: Add Custom Finishing Touches If Needed

This is where the page goes from “customized template” to “professional design.” These small details make a disproportionate difference.
👉 Add a hover animation to buttons and images. Inside any widget’s Style tab, look for the Hover state option. A subtle scale transformation (1.02 to 1.05) on image cards and a background color shift on buttons add interactivity, making the page feel alive.
👉 Use consistent border radius values. If your buttons have 8px rounded corners, use 8px on cards, images, and form fields too. Mixing sharp and round elements on the same page looks accidental.
👉 Use white space intentionally. Beginners tend to fill every inch of the page with content. Professional designers do the opposite. Generous spacing between sections makes each element easier to read and gives the page a premium feel. However, the templates that you will find in Templately are already designed keeping these principles in mind.
👉 Add a sticky header. If your theme or template includes a navigation header, making it sticky (fixed on scroll) significantly improves the navigation experience. In Elementor Pro, this is controlled under the Header section settings. For the free version, your theme may handle this natively.
👉 Check your color contrast. Light gray text on white backgrounds is a common template choice that fails accessibility standards. Templates in Templately are designed accordingly. However, if you make changes to the color, use the WebAIM Contrast Checker to verify that your text-to-background contrast ratio meets the WCAG AA standard (minimum 4.5:1 for normal text). This is not just about accessibility; low contrast text also hurts readability for all users.
Step 7: Optimize for SEO Before Publishing
A beautiful page that nobody can find is a missed opportunity. Elementor works well with popular SEO plugins, and a few quick settings make a real difference.
Install an SEO plugin. Rank Math and Yoast SEO are the two most popular free options for WordPress. Both integrate directly with Elementor and let you set a focus keyword, edit the meta title and description, and check your content against SEO best practices.
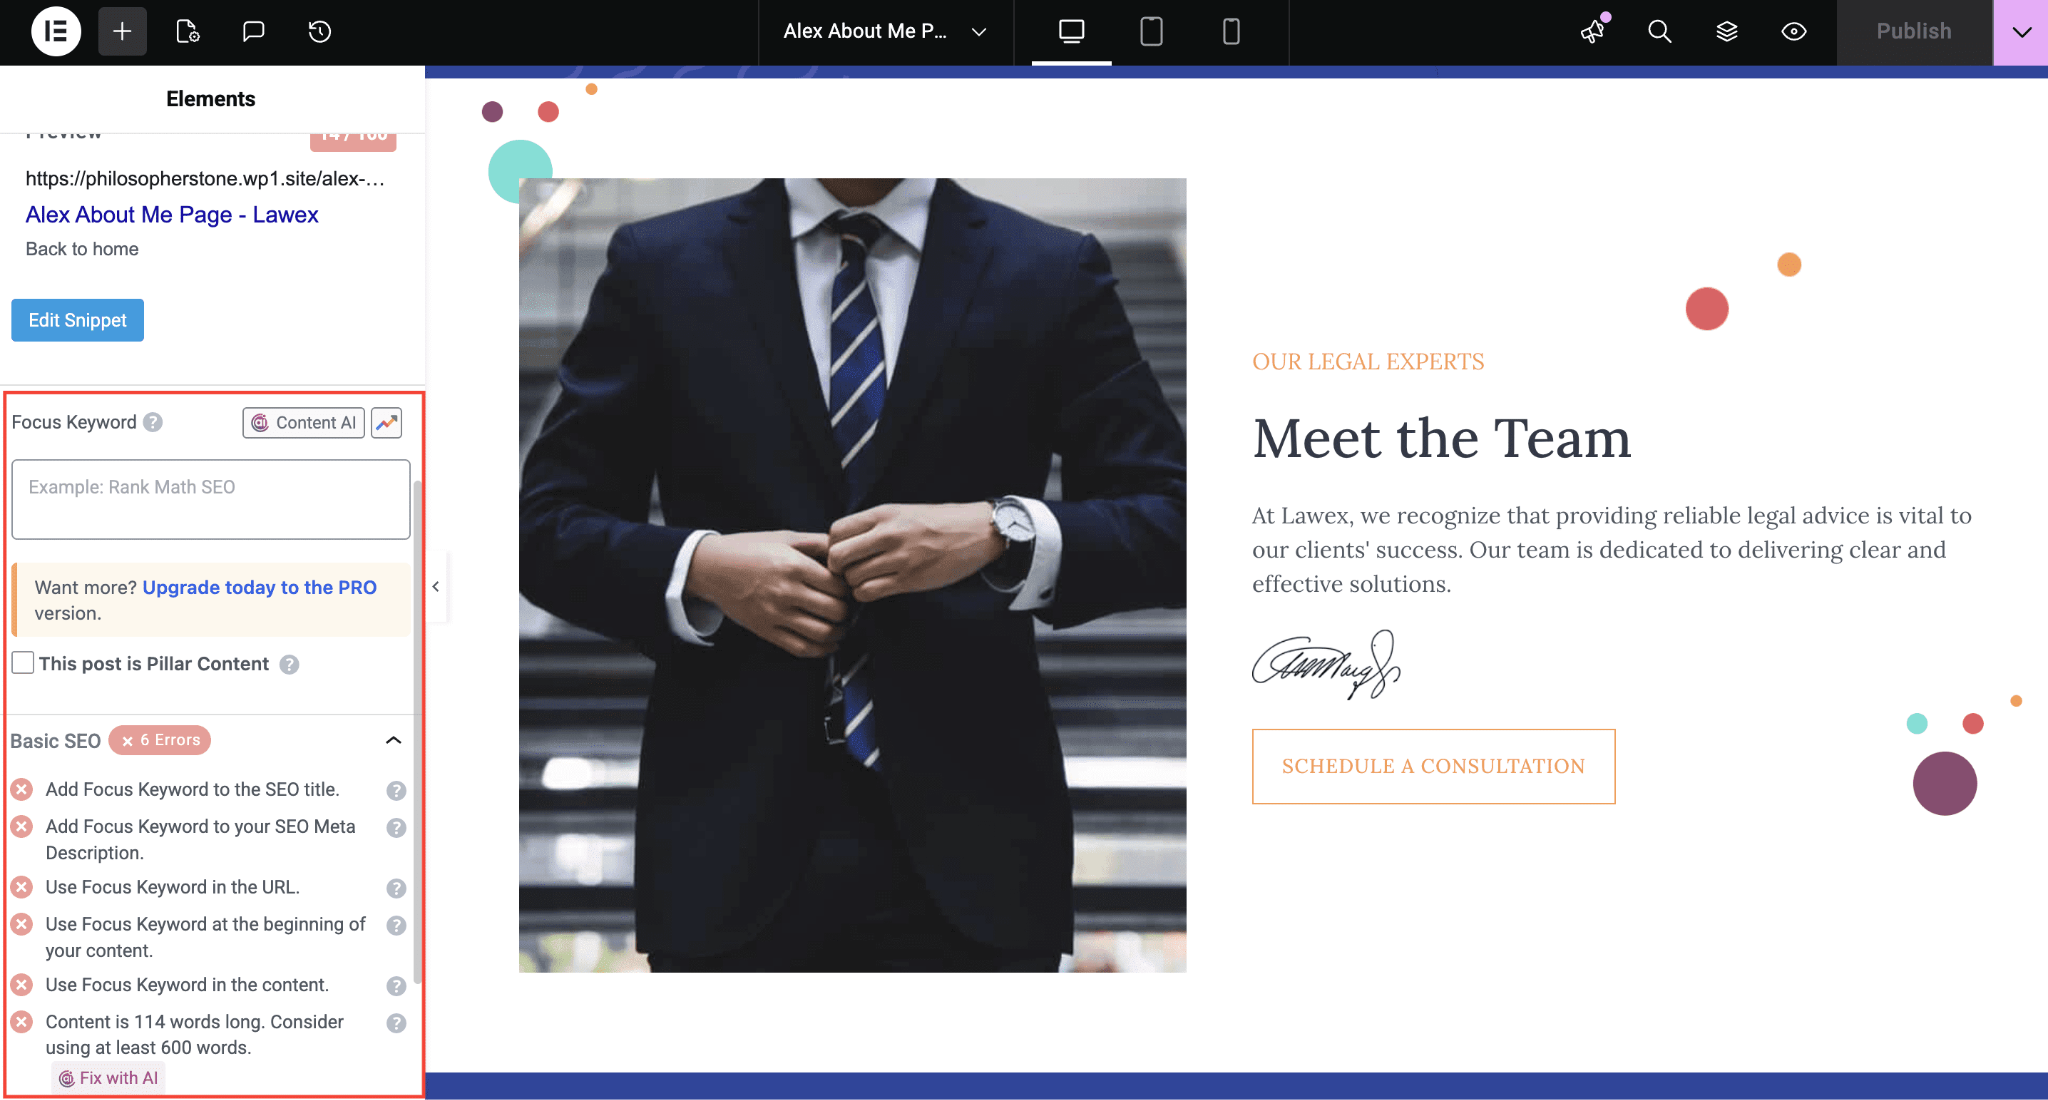
Set a clear page title (H1). Every page should have exactly one H1 tag. Make sure it includes your primary keyword naturally. Elementor lets you set the HTML tag for any heading widget, so double-check that your main page headline is set to H1, not H2.
Add alt text to all images. Click any image widget, go to the Content tab and fill in the Image Alt Text field. Describe what the image actually shows. Good alt text helps search engines understand your content and also improves accessibility for screen reader users.
Set a focus keyword for your page. Using Rank Math or Yoast, define the main keyword you want the page to rank for. These plugins analyze your content and give real-time suggestions. Aim for the green light, but do not stuff keywords unnaturally.
Check your page loading speed. A slow page hurts both SEO and user experience. After publishing, run your page through Google PageSpeed Insights. Common culprits in Elementor pages include uncompressed images, unused CSS from multiple plugins and unoptimized web fonts. A caching plugin like W3 Total Cache or WP Rocket (paid) can fix many of these issues with minimal configuration.
Common Mistakes to Avoid When Customizing Elementor Templates
Learning what not to do is just as valuable as knowing what to do. So, while customizing free Elementor templates, make sure you follow these tips:
👉 Do not use too many fonts. One heading font and one body font are enough. Adding a third or fourth font family makes the page look chaotic and slows it down.
👉 Do not ignore the template’s original column structure. Elementor uses a column-based grid. When you start adding or deleting columns arbitrarily, the layout breaks on certain screen sizes. Work within the existing structure where possible and only restructure when you truly need to.
👉 Do not resize images by dragging them. Always use the actual width and height fields in the widget settings. Dragging images in the editor often creates sizing inconsistencies that are hard to track down later.
👉 Do not publish without previewing on a real mobile device. The editor’s mobile preview is helpful but not perfect. Use your phone to browse the actual page after publishing. Real device testing catches issues the editor preview misses.
👉 Do not forget to update your page’s slug. Templates often get published with auto-generated URLs like “page-2” or “sample-page.” Update the URL slug in the WordPress editor to something clean, descriptive, and keyword-relevant before you share the page.
Run through this list before hitting the publish button:
- Global colors and fonts match your brand
- All placeholder text has been replaced with real content
- All images are optimized and properly sized
- All buttons link to the correct destination
- The page looks good on desktop, tablet and mobile
- Alt text is added to all images
- The H1 heading includes your primary keyword
- The meta title and description are set in your SEO plugin
- The URL slug is clean and descriptive
- You have previewed the page on an actual mobile device
Customize Free Elementor Templates Like a PRO
Customizing a free Elementor template is not about doing a complete redesign. It is about making smart, systematic changes that align the template with your brand, your content and your audience. Start with global styles, work your way through the layout and content and finish with mobile optimization and SEO settings.
The templates give you the structure. You bring the brand, the message and the finishing details. When those two things come together, the result looks far more professional than most people expect from a free starting point.
Take it one step at a time, use this guide as your reference, and you will have a polished, publish-ready page without the need for a designer or a large budget.
Was this blog helpful for you? Let us know in our Facebook Community. For more web design-related tips and tricks, subscribe to our blog.