The WordPress Gutenberg editor has transformed content creation with its block-based approach, but it also introduces unique optimization challenges. If not properly configured, Gutenberg can add unnecessary CSS, JavaScript and database bloat that slows your site and impacts your search rankings. This comprehensive guide will walk you through proven strategies for optimizing WordPress Gutenberg sites for speed and SEO.
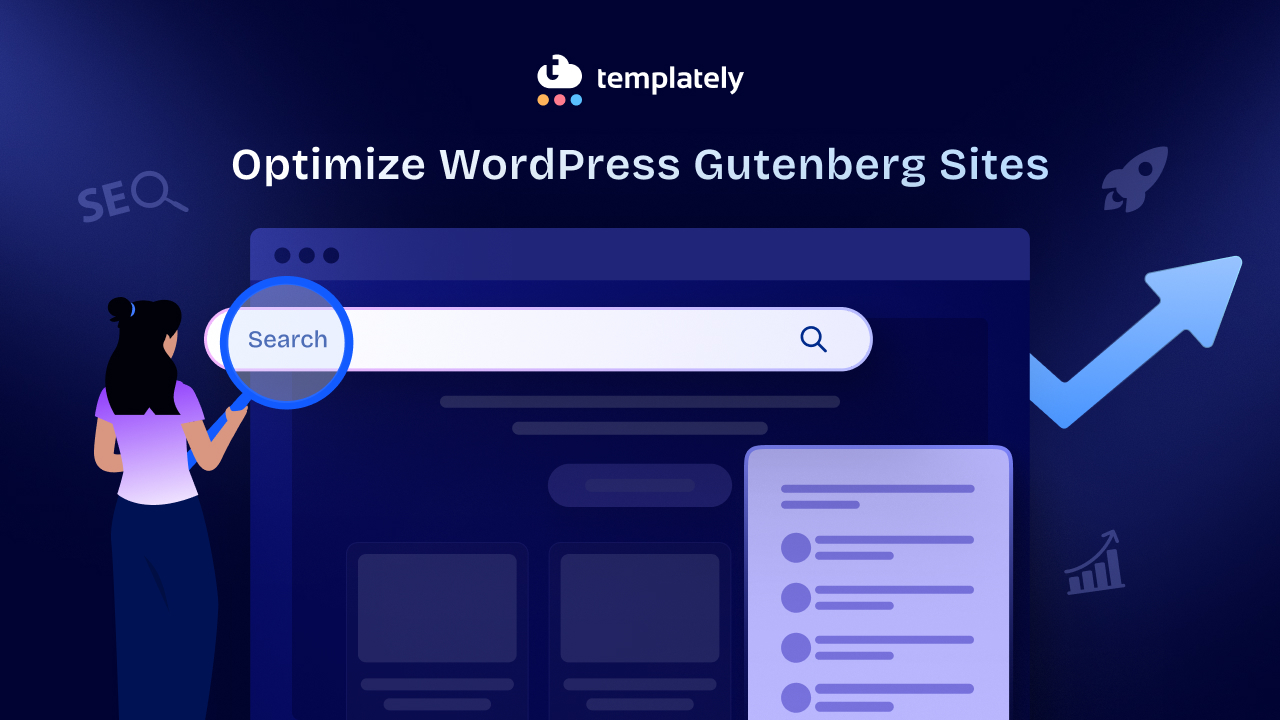
What Is the Impact of Gutenberg on Your Site’s Performance?
Before diving into optimization techniques, it is important to understand how Gutenberg affects your site’s performance. The block editor loads additional CSS and JavaScript files for each block type used on a page. While this modular approach offers tremendous flexibility in content creation, it introduces several performance considerations that need to be addressed.
Each block in Gutenberg comes with its own stylesheet and sometimes JavaScript functionality. When you create a page using ten different block types, WordPress may load individual CSS files for each of those blocks. This means a single page could easily load twenty or more CSS files, significantly increasing HTTP requests and slowing down page load times. Additionally, the HTML markup that Gutenberg generates includes block-specific comments and wrapper divs, which increase the overall page size compared to traditional WordPress content.
The block parsing process also adds computational overhead. Every time a page loads, WordPress must parse the block markup from the database, identify which blocks are present, and render them appropriately. This parsing happens on each page load unless you implement proper caching strategies. Furthermore, many block styles are loaded globally across your entire site, even on pages where those specific blocks are not used, creating unnecessary bloat.
Tips And Best Practices: Optimizing WordPress Gutenberg Sites for Speed And SEO
The good news is that with proper optimization, you can harness Gutenberg’s power while maintaining excellent performance metrics. The strategies outlined in this guide will help you strike the perfect balance between functionality and speed.
1. Optimize Block Loading And Asset Management
Load Only Required Block Assets: By default, WordPress loads CSS for all registered blocks on every page, even if those blocks are not used. This creates unnecessary overhead.
Solution: Disable Unused Block Styles
Add this code to your theme’s functions.php file:
function remove_unused_block_styles() {
    // Remove core block styles if not using specific blocks
    wp_dequeue_style('wp-block-library');
    wp_dequeue_style('wp-block-library-theme');

    // Keep only if using WooCommerce blocks
    wp_dequeue_style('wc-blocks-style');

    // Remove classic theme styles if using block theme
    wp_dequeue_style('classic-theme-styles');
}
add_action('wp_enqueue_scripts', 'remove_unused_block_styles', 100);
For More Selective Control: Use a plugin like Asset CleanUp or Perfmatters to conditionally load block styles only on pages where specific blocks are used.
Consolidate Block Styles: Instead of loading individual CSS files for each block, combine them into a single stylesheet:
function consolidate_block_styles() {
    // Deregister individual block styles
    wp_deregister_style('wp-block-library');

    // Enqueue your consolidated stylesheet
    wp_enqueue_style(
        'custom-block-styles',
        get_template_directory_uri() . '/assets/css/blocks-consolidated.css',
        array(),
        '1.0.0'
    );
}
add_action('wp_enqueue_scripts', 'consolidate_block_styles', 100);
Create your consolidated stylesheet by extracting only the styles for blocks you actually use from WordPress core CSS files.
Defer Non-Critical Block JavaScript: Many Gutenberg blocks load JavaScript that isn’t immediately necessary for initial page render:
function defer_block_scripts($tag, $handle) {
    // List of script handles to defer
    $defer_scripts = array(
        'wp-block-library',
        'wp-block-navigation',
        'wp-block-search'
    );

    if (in_array($handle, $defer_scripts)) {
        return str_replace(' src', ' defer src', $tag);
    }

    return $tag;
}
add_filter('script_loader_tag', 'defer_block_scripts', 10, 2);
2. Image Optimization for Gutenberg
Images are typically the largest contributor to page weight. Gutenberg’s Image and Gallery blocks make it easy to add visuals, but they require careful optimization.
Enable WebP Format with Fallbacks: Modern image formats like WebP offer superior compression. WordPress 5.8+ supports WebP uploads natively. Convert existing images to WebP.
- Use plugins like ShortPixel, Imagify, or EWWW Image Optimizer
- These plugins automatically serve WebP to supported browsers with fallbacks
Implement Proper Lazy Loading: WordPress enables native lazy loading for images by default, but you can enhance this:
function optimize_gutenberg_images($content) {
    // Ensure lazy loading is applied
    $content = str_replace('<img ', '<img loading="lazy" ', $content);

    // Add fetchpriority to first image
    if (strpos($content, '<img') !== false) {
        $content = preg_replace(
            '/(<img[^>]*class="[^"]*wp-block-image[^"]*"[^>]*)>/',
            '$1 fetchpriority="high">',
            $content,
            1
        );
    }

    return $content;
}
add_filter('the_content', 'optimize_gutenberg_images');
Use Appropriate Image Dimensions
One of the most wasteful performance mistakes is uploading oversized images and relying on CSS or HTML attributes to resize them for display. When you upload a 4000-pixel-wide image but display it at 800 pixels wide, visitors still download the full 4000-pixel version, wasting bandwidth and slowing page loads.
Before uploading any image to your WordPress media library, determine the maximum width at which it will be displayed on your site.
👉 For most WordPress themes, the main content area ranges from 700 to 1200 pixels wide. Check your theme’s documentation or use browser developer tools to inspect the actual content width. Once you know this dimension, resize your images accordingly before uploading them.
👉 For retina and high-resolution displays, you can upload images at up to twice the display width to ensure crisp rendering on high-DPI screens. For example, if your content area is 1000 pixels wide, uploading images at 2000 pixels wide provides excellent quality on retina displays while still being significantly smaller than an unoptimized 4000-pixel image.
WordPress automatically generates multiple image sizes when you upload files and uses the srcset attribute to serve appropriately sized versions based on the visitor’s device. However, this system works best when your uploaded image is appropriately sized to begin with. If your originally uploaded image is too big, all the smaller versions WordPress makes will also be too big for what you actually need. Consider these general dimension guidelines for different image use cases.
👉 For full-width hero images or featured images that span the entire browser width, 1920 pixels provides excellent quality for most displays without excessive file size.
👉 For images within your main content area, 1200 pixels wide typically suffices.
👉 For smaller images like thumbnails, author avatars, or gallery previews, 400 pixels is usually adequate.
Always balance image quality with file size. A slightly smaller, well-compressed image often looks nearly identical to an oversized version while loading much faster.
Optimize the Cover Block
The Cover block is one of Gutenberg’s most visually impressive features, allowing you to create stunning hero sections with background images or videos. However, this visual appeal comes at a performance cost if not implemented carefully.
Background images in Cover blocks often display at full browser width, which means they need to be fairly large to look good on wide desktop monitors. The challenge is creating an image that looks sharp on large screens without creating an enormous file that slows page loads.
👉 Aim to keep your Cover block background images under 200 kilobytes through aggressive compression. Modern image compression tools can often achieve this file size while maintaining visual quality, especially for photographic backgrounds where minor compression artifacts are less noticeable.
When choosing backgrounds for your Cover blocks, consider whether a full photographic image is necessary for your design goals. Solid colors and CSS gradients serve as excellent alternatives that add visual interest with virtually no performance cost. A well-designed gradient can create a professional, modern look while adding only a few bytes to your page size. If you do use images, consider whether subtle textures or patterns might work instead of detailed photographs. These simpler images compress much more efficiently.
Video backgrounds in Cover blocks create even greater performance challenges. Videos can easily reach several megabytes in size, making them impractical for most use cases. If you must use video backgrounds, always include a poster image, a static frame from the video that displays while the video loads or on devices where autoplay is disabled. More importantly, implement lazy loading for video backgrounds so they only begin downloading when the user scrolls near the Cover block containing them. For many sites, it is worth questioning whether video backgrounds provide enough value to justify their performance impact.
An often-overlooked alternative to images in Cover blocks is the use of CSS gradients and solid colors with overlay effects. Gutenberg’s Cover block includes built-in controls for color overlays and gradient backgrounds. These options create visually appealing sections while maintaining excellent performance. Experiment with color overlays on simple background images or pure gradient backgrounds. You may find they achieve your design goals without the performance penalties of heavy imagery.
3. Database Optimization for Gutenberg Content
Gutenberg stores block data as HTML comments in the database, which can increase post content size significantly.
👉 Clean Up Revisions: Gutenberg creates revisions with full block markup, quickly bloating your database:
// Limit post revisions in wp-config.php
define('WP_POST_REVISIONS', 3);

// Or disable completely (not recommended)
define('WP_POST_REVISIONS', false);
Use plugins to clean existing revisions:
- WP-Optimize
- Advanced Database Cleaner
- WP-Sweep
👉 Optimize Reusable Blocks: Reusable blocks are stored as a custom post type (wp_block), creating additional database entries:
- Limit the number of reusable blocks
- Regularly audit and delete unused reusable blocks
- Consider converting rarely-used reusable blocks to regular patterns
👉 Remove Auto-Save Data: Gutenberg auto-saves frequently, creating temporary data:
// Reduce autosave frequency (in seconds)
define('AUTOSAVE_INTERVAL', 300); // 5 minutes instead of default 60 seconds
4. Caching Strategies for Gutenberg Sites
Effective caching is crucial for Gutenberg performance since block parsing happens on every page load.
👉 Implement Full-Page Caching: Use a robust caching plugin that handles Gutenberg markup properly. Some recommended plugins are,
- WP Rocket (premium, excellent Gutenberg support)
- LiteSpeed Cache (free, works with LiteSpeed servers)
- W3 Total Cache (free, requires configuration)
Essential cache settings:
- Enable page caching
- Enable browser caching
- Enable GZIP compression
- Minify HTML, CSS, and JavaScript
- Combine CSS files
- Remove query strings from static resources
👉 Object Caching for Block Parsing: Gutenberg parses blocks on each page load, which is CPU-intensive. Object caching stores parsed blocks in memory,
// Enable object caching with Redis or Memcached
// Install appropriate plugin, then add to wp-config.php:
define('WP_CACHE_KEY_SALT', 'yourdomain.com');
Object caching plugins:
- Redis Object Cache
- W3 Total Cache (includes object caching)
👉 Cache Dynamic Blocks Carefully: Some Gutenberg blocks are dynamic (generate content on page load). These need special caching consideration:
- Latest Posts block
- Calendar block
- RSS block
- Archives block
Configure your cache to handle these blocks with shorter cache lifetimes or exclude them from caching if they must always show fresh data.
5. CDN Integration for Block Assets
A Content Delivery Network (CDN) speeds up your website by serving your images, CSS, and JavaScript files from servers located close to your visitors. Instead of everyone downloading files from your main server (which might be far away), they get files from a nearby server, making your site load faster worldwide.
For example, if your main server is in New York but a visitor accesses your site from Tokyo, a CDN will serve your images and files from a server in Asia instead of making that visitor wait for data to travel across the Pacific Ocean. This geographic proximity can reduce load times from several seconds to just milliseconds.
CDN Setup for Gutenberg
Setting up a Content Delivery Network for your Gutenberg site involves selecting the right provider and configuring it properly to serve your block assets efficiently. When choosing a CDN provider, you have several excellent options to consider.
👉 Cloudflare offers a free tier that works exceptionally well for most WordPress sites and includes additional security features like DDoS protection and SSL certificates.
👉 BunnyCDN has gained popularity for its affordable pricing and excellent performance, particularly for image-heavy sites.
👉 KeyCDN offers a straightforward pay-as-you-go pricing model that works well for sites with fluctuating traffic.
Once you have selected your CDN provider, the configuration process typically involves integrating it with your caching plugin. Most modern WordPress caching solutions include built-in CDN integration that makes the setup process straightforward.
The critical consideration for Gutenberg sites is ensuring that all block assets, such as CSS files, JavaScript files, and images embedded within blocks, are properly served through the CDN network. You should thoroughly test your site after CDN implementation to verify that block functionality remains intact and that interactive elements continue to work as expected.
To verify that your block assets are being served correctly through the CDN, inspect your page source code. You should see URLs that point to your CDN domain rather than your primary site URL. For example, block library stylesheets should load from addresses like:
https://cdn.yourdomain.com/wp-includes/css/dist/block-library/style.min.css
rather than from your main domain.
💡 How to Optimize CDN for Gutenberg Blocks?
function cdn_rewrite_urls($content) {
    $cdn_url = 'https://cdn.yourdomain.com';
    $site_url = get_site_url();

    // Rewrite URLs in block content
    $content = str_replace($site_url . '/wp-content', $cdn_url . '/wp-content', $content);
    $content = str_replace($site_url . '/wp-includes', $cdn_url . '/wp-includes', $content);

    return $content;
}
add_filter('the_content', 'cdn_rewrite_urls');
6. SEO Optimization for Gutenberg Content
Gutenberg’s block structure offers unique opportunities for SEO enhancement when used strategically.
Proper Heading Structure
One of the most common SEO mistakes in Gutenberg sites is improper heading hierarchy. While the block editor makes it incredibly easy to add headings with just a few clicks, this convenience can lead to structural problems that hurt your search engine rankings.
Search engines use heading tags to understand the structure and hierarchy of your content. Your page should have exactly one H1 tag, which WordPress automatically assigns to your post or page title. All subsequent headings should follow a logical hierarchical order, moving from H2 to H3 to H4 as you dive deeper into subtopics. Think of it like an outline: main sections get H2 tags, subsections within those get H3 tags, and further subdivisions receive H4 tags.
Skipping heading levels is a common mistake that confuses both search engines and assistive technologies. For instance, jumping from an H2 directly to an H4 without an intervening H3 breaks the logical flow of your document structure. Additionally, using headings solely for styling purposes rather than structural purposes undermines the semantic meaning of your content. If you need larger or bolder text for design reasons, use CSS styling on paragraph text rather than misusing heading tags.
The strategic placement of keywords in your headings also matters for SEO, but these keywords should appear naturally within the context of your headings. Forcing keywords awkwardly into headings makes your content read poorly and can actually harm your SEO efforts. Instead, focus on creating descriptive, useful headings that naturally incorporate relevant search terms.
You can audit your heading structure by opening your browser’s developer console and running a simple JavaScript command that displays all headings on your page in order. This allows you to quickly spot any structural issues:
// Run in browser console to audit headings
document.querySelectorAll('h1, h2, h3, h4, h5, h6').forEach(heading => {
    console.log(heading.tagName, heading.textContent);
});
Optimize Block Markup for Schema
Add structured data to relevant Gutenberg blocks:
function add_schema_to_blocks($content) {
    // Add FAQ schema to appropriate blocks
    if (has_block('core/heading') && has_block('core/paragraph')) {
        // Detect FAQ patterns and add schema
        // This is a simplified example
        $faq_schema = array(
            '@context' => 'https://schema.org',
            '@type' => 'FAQPage',
            'mainEntity' => array()
        );

        // Add to footer or via JSON-LD
    }

    return $content;
}
add_filter('the_content', 'add_schema_to_blocks');
Or use plugins:
- Rank Math
- Yoast SEO
- Schema PRO
These automatically add schema for Gutenberg blocks like FAQs, How-To, and Reviews.
Table of Contents Block
Add a table of contents for longer articles to improve SEO and user experience:
- Use the built-in Table of Contents block or plugins like Essential Blocks for a structured Table of Contents
- Generates anchor links to headings
- Improves page structure and internal linking
- Increases time on page and reduces bounce rate
Optimize Alt Text And Captions
Gutenberg’s Image block provides intuitive fields for adding accessibility and SEO-friendly image data, but many users overlook these important optimization opportunities or fill them in hastily without strategic thought.
Alt text serves a dual purpose: it helps visually impaired users understand your images through screen readers and it provides search engines with context about your visual content. Every image on your site should have descriptive alt text that explains what the image shows and, when relevant, how it relates to the surrounding content.
Rather than generic descriptions like “image” or “photo,” write specific alt text such as “WordPress dashboard showing Gutenberg block editor interface with paragraph and image blocks.” This descriptive approach helps search engines understand and potentially rank your images in image search results.
Your image file names also contribute to SEO. Before uploading images to WordPress, rename them with descriptive, keyword-rich names using hyphens to separate words.
A file named “IMG_1234.jpg” provides no SEO value, whereas “gutenberg-block-editor-performance-optimization.jpg” clearly communicates the image content to search engines. This seemingly small detail can accumulate into significant SEO benefits across dozens or hundreds of images on your site.
Captions serve a different purpose than alt text. While alt text replaces the image for those who can not see it, captions supplement the image for all users. Add captions when they provide additional context, attribution, or information that enhances understanding. Not every image needs a caption, but when used appropriately, captions increase engagement and provide another opportunity to include relevant keywords naturally.
Finally, ensure that your XML sitemap includes all images from your posts and pages. Most modern SEO plugins like Rank Math and Yoast SEO automatically include images in your sitemap, but it is worth verifying this setting. Image sitemaps help search engines discover and index your visual content more effectively.
Internal Linking with Link Block
Strategic internal linking is one of the most underutilized SEO tactics available to WordPress site owners. Internal links help distribute page authority throughout your site, guide visitors to related content, and signal to search engines which pages you consider most important.
When creating content in Gutenberg, make it a habit to link to your existing relevant articles and cornerstone content. These links should feel natural within the flow of your writing rather than forced or awkwardly inserted. For example, if you are writing about WordPress performance and mention image optimization, linking to a detailed guide about image compression provides genuine value to readers while strengthening your site’s internal link structure.
The anchor text you choose for internal links matters significantly for SEO. Descriptive, keyword-rich anchor text helps search engines understand what the linked page is about. Instead of using generic phrases like “click here” or “read more,” use specific descriptions such as “learn more about WordPress caching strategies” or “our complete guide to Core Web Vitals.” This approach provides context to both users and search engines.
Beyond standard inline text links, Gutenberg’s Buttons block offers an excellent opportunity for a prominent call-to-action that drives readers to important pages. These visually distinct buttons can highlight your cornerstone content, product pages, or newsletter signup forms. However, use buttons judiciously; too many calls-to-action can overwhelm visitors and dilute the effectiveness of each one.
To maintain a healthy internal link structure, periodically audit your site using tools like Screaming Frog or Ahrefs. These tools help identify orphaned pages with no internal links pointing to them, broken links that need fixing, and opportunities to add links to important pages that aren’t receiving enough internal link equity.
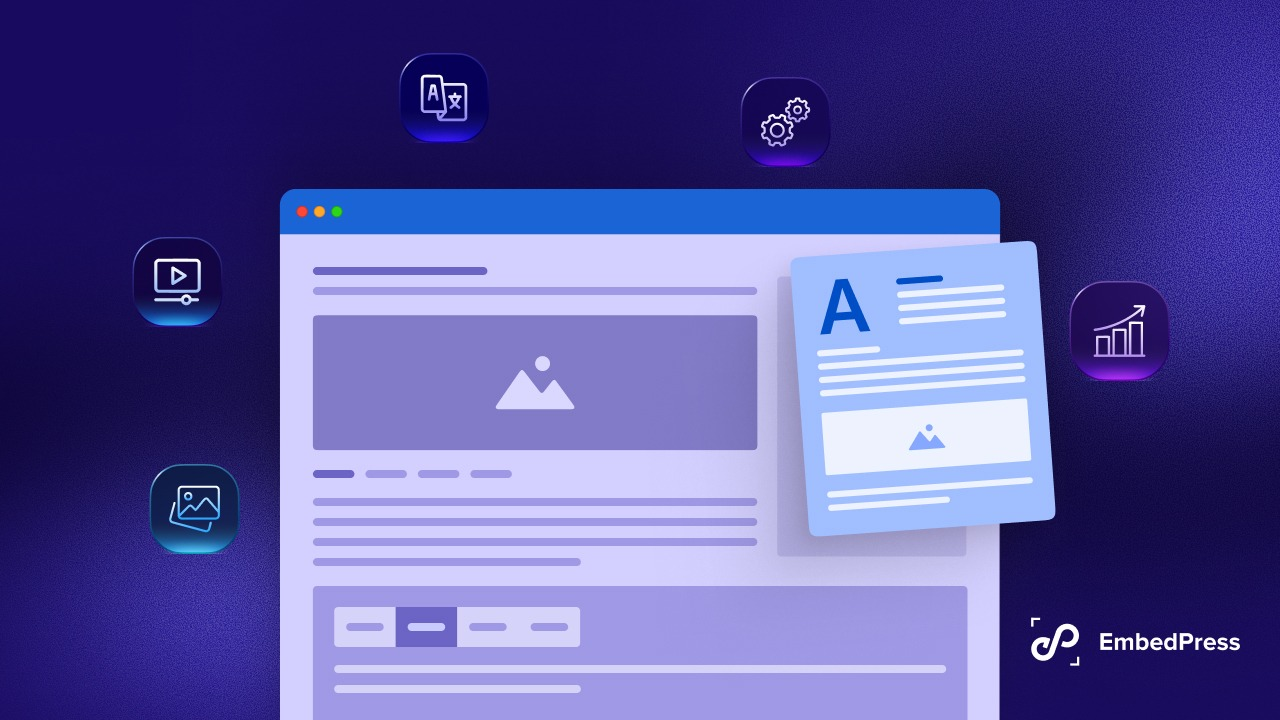
Optimize Embedded Content
Gutenberg’s Embed blocks (YouTube, Twitter, etc.) can slow your site significantly:
Solutions:
- Use lazy loading for embeds (many cache plugins include this)
- Replace video embeds with thumbnail images that load videos on click
- Limit the number of embeds per page
- Consider linking to external content instead of embedding
function lazy_load_embeds($content) {
    // Replace YouTube embeds with lite-youtube-embed
    $content = preg_replace(
        '/<div class="wp-block-embed__wrapper">.*?youtube\.com\/embed\/([\w-]+).*?<\/div>/s',
        '<lite-youtube videoid="$1"></lite-youtube>',
        $content
    );

    return $content;
}
add_filter('the_content', 'lazy_load_embeds');
Then include the lite-youtube-embed library for significantly faster YouTube embeds.
7. Mobile Optimization for Gutenberg
Mobile-first indexing makes mobile optimization critical for SEO. Gutenberg includes responsive controls for many blocks. So,
- Use the responsive padding/margin controls
- Test blocks on mobile devices regularly
- Adjust font sizes for mobile viewports
- Stack columns on mobile (automatic in most themes)
Mobile-Specific Optimizations:
function mobile_optimizations() {
    if (wp_is_mobile()) {
        // Disable unnecessary blocks on mobile
        wp_dequeue_style('wp-block-cover');

        // Load smaller images
        add_filter('wp_calculate_image_srcset_meta', function($image_meta) {
            // Customize for mobile
            return $image_meta;
        });
    }
}
add_action('wp_enqueue_scripts', 'mobile_optimizations');
Accelerated Mobile Pages (AMP): Consider implementing AMP for mobile pages.
- Use the official AMP plugin for WordPress
- Ensure Gutenberg blocks are AMP-compatible
- Test AMP pages with Google’s AMP validator
- Monitor AMP performance in Search Console
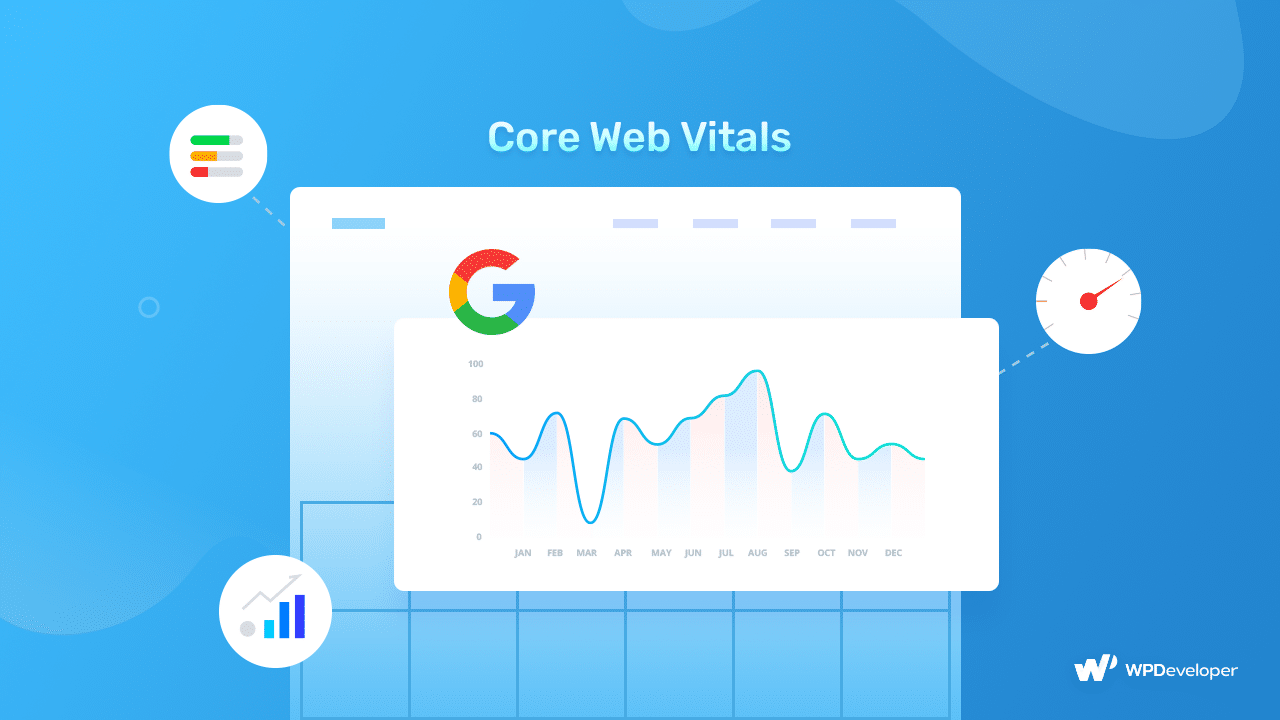
8. Core Web Vitals Optimization
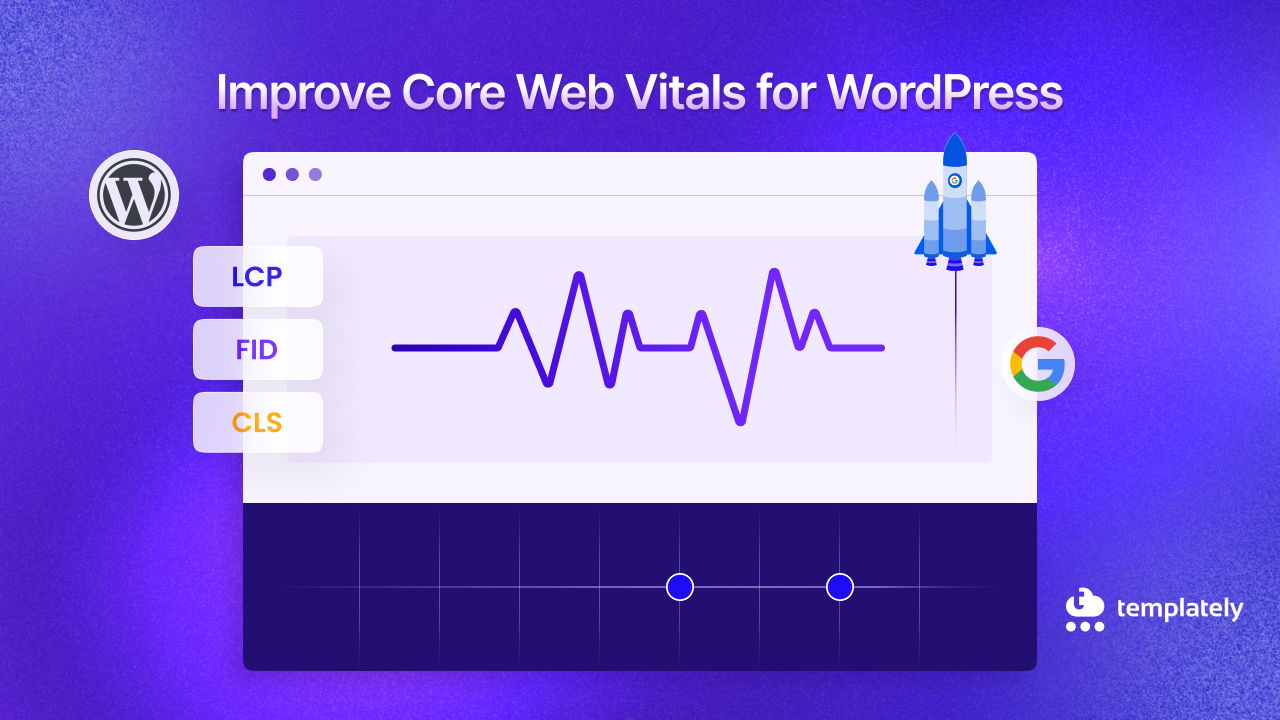
Google’s Core Web Vitals are critical ranking factors. Here is how to optimize Gutenberg for each metric:
Largest Contentful Paint (LCP)
Largest Contentful Paint measures how quickly the main content of your page becomes visible to users. Google considers an LCP under 2.5 seconds as good performance. For Gutenberg sites, the largest contentful element is typically a hero image in a Cover block, a featured image, or the first large image in your content.
Optimizing LCP starts with identifying which element on your page is the largest. You can discover this by running a PageSpeed Insights test, which specifically identifies the LCP element. Once you know which element matters most, optimize it aggressively. If it is an image, compress it to the smallest file size that maintains acceptable quality, convert it to WebP or AVIF format, and ensure it is sized appropriately for display rather than being unnecessarily large.
Using a Content Delivery Network significantly improves LCP by reducing the geographic distance between your server and your visitors. A visitor in Australia accessing a server in the United States might experience several hundred milliseconds of additional latency compared to a CDN edge server in Sydney serving the same content.
Preloading critical resources tells the browser to prioritize downloading specific assets before it would normally discover them during page parsing. For your LCP element, adding a preload hint can shave several hundred milliseconds off your LCP time:
function preload_critical_assets() {
    echo '<link rel="preload" as="image" href="' . get_template_directory_uri() . '/hero-image.webp" fetchpriority="high">';
}
add_action('wp_head', 'preload_critical_assets', 1);
Render-blocking resources—CSS and JavaScript files that must be processed before the browser can display content—directly delay your LCP. Eliminate these blockers by inlining critical CSS directly in your HTML head, deferring non-critical JavaScript to load after initial page render and removing any unnecessary scripts or styles that Gutenberg loads by default.
First Input Delay (FID) / Interaction to Next Paint (INP)
First Input Delay measures the time between when a user first interacts with your page (clicking a button, tapping a link) and when the browser can actually respond to that interaction. Google is transitioning to Interaction to Next Paint (INP), which measures responsiveness throughout the entire page visit rather than just the first interaction. Target scores are under 100 milliseconds for FID and under 200 milliseconds for INP.
Poor FID and INP scores typically result from the browser being too busy executing JavaScript to respond to user interactions. When your site loads dozens of scripts for various Gutenberg blocks, these scripts compete for the browser’s main thread, creating delays in responsiveness. The solution involves reducing the total amount of JavaScript that executes during page load and optimizing how that JavaScript runs.
Minimizing JavaScript execution starts with removing unnecessary scripts. Many WordPress sites load jQuery even when no code on the page actually uses it. If your theme and plugins do not require jQuery, deregister it to eliminate that overhead. Review every JavaScript file your site loads and question whether it is truly necessary for every page.
Deferring non-critical JavaScript prevents scripts from blocking the main thread during initial page load. By adding the defer attribute to script tags, you tell the browser to download scripts without interrupting HTML parsing and to execute them only after the initial page render completes. This keeps the page interactive sooner, even though the same amount of JavaScript eventually runs.
For JavaScript tasks that must execute but do not need to happen immediately, breaking long tasks into smaller chunks prevents the browser from becoming unresponsive. If a script needs to process 1000 items, processing them in batches of 100 with small delays between batches keeps the main thread available for user interactions. Web workers provide another solution for heavy computations—they run JavaScript in background threads that do not block user interactions, though they have limited access to the DOM.
Cumulative Layout Shift (CLS)
Cumulative Layout Shift measures visual stability, how much page elements move around during loading. You have likely experienced poor CLS when reading an article and suddenly the text jumps down because an image above loaded late, causing you to lose your place. Google considers a CLS score under 0.1 as good.
For Gutenberg sites, layout shifts commonly occur when images load without specified dimensions or when dynamic blocks insert content after initial page render. The solution is ensuring the browser knows exactly how much space to reserve for every element before it loads.
Specifying width and height attributes for all images is crucial. When the browser knows an image’s dimensions ahead of time, it can reserve the correct amount of space even before the image downloads. WordPress automatically adds these attributes when you upload images through the media library, but verify they are present in your rendered HTML. If you’re manually coding image tags or using JavaScript to insert images, ensure you include explicit dimensions.
Embedded content from YouTube, Twitter and other services creates particularly problematic layout shifts because the browser does not know how much space to reserve until the embed loads. Reserve space for these embeds using CSS aspect ratio boxes. Define a container with a specific aspect ratio (typically 16:9 for videos) that prevents layout shifts when the embed content loads.
Dynamic Gutenberg blocks that insert content from the database after page load inherently cause layout shifts. The Latest Posts block, for example, queries your database and renders content after the initial page load. Where possible, reserve space for dynamic content using min-height CSS properties. If a dynamic block typically shows three posts at 200 pixels each, set a min-height of 600 pixels on the container so the layout doesn’t shift when content populates.
Avoid inserting any content above existing content after the page begins loading. Notifications, banners, or promotional bars that push content downward create jarring layout shifts that frustrate users and hurt your CLS score. If you must show such content, reserve space for it in your initial page layout or overlay it without pushing existing content.
Monitoring Core Web Vitals
Continuous monitoring of your Core Web Vitals helps you understand trends and catch performance regressions before they significantly impact your search rankings or user experience.
Google PageSpeed Insights provides the most direct measurement of how Google evaluates your site’s performance. The tool combines lab data from simulated tests with real user data from Chrome browsers visiting your site. This combination gives you both controlled test results and actual user experience metrics. Test your key pages regularly and pay attention to the specific recommendations PageSpeed Insights provides.
Google Search Console’s Core Web Vitals report shows performance across your entire site based on real user data collected through Chrome. This report groups your URLs into categories: Good, Needs Improvement and Poor. Focus your optimization efforts on pages in the Poor category first, as these are most likely to harm your search rankings. The report also shows trends over time, allowing you to see whether your optimization efforts are improving real-world performance.
The Chrome User Experience Report provides raw field data about how real Chrome users experience your site. This data powers the Core Web Vitals report in Search Console, but you can access it directly through the CrUX dashboard for more detailed analysis. Field data reflects actual user experiences across different devices, connection speeds and geographic locations, providing insights that lab testing alone cannot reveal.
WebPageTest offers the most detailed performance analysis available, with frame-by-frame filmstrip views showing exactly how your page renders, waterfall charts displaying every network request and extensive metrics about resource loading. The ability to test from different geographic locations and on different connection speeds helps you understand the full range of user experiences. For Gutenberg sites specifically, WebPageTest can help identify which blocks load slowly or create rendering bottlenecks.
GTmetrix complements other tools with its historical tracking features that automatically test your site on a regular schedule. This passive monitoring catches performance regressions that occur after plugin updates, theme changes, or content additions without requiring you to remember to run manual tests.
9. Advanced Performance Techniques
These foundational improvements stated above will deliver immediate, noticeable results. From there, progressively implement more advanced techniques based on your specific site’s needs and performance bottlenecks. Your users and your search rankings will reflect your commitment to performance excellence. Below are advanced performance techniques,
Critical CSS for Block Styles
Generate and inline critical CSS for above-the-fold block content:
- Use tools like Critical CSS generator or plugins
- Inline critical styles in the <head>
- Load remaining styles asynchronously
function inline_critical_block_css() {
    $critical_css = file_get_contents(get_template_directory() . '/critical-blocks.css');
    echo '<style>' . $critical_css . '</style>';
}
add_action('wp_head', 'inline_critical_block_css', 1);
Disable Gutenberg Preloading
Gutenberg preloads REST API requests, which can be unnecessary overhead:
function disable_gutenberg_preloading() {
    // Only disable on frontend
    if (!is_admin()) {
        remove_action('wp_head', 'wp_oembed_add_discovery_links');
        remove_action('wp_head', 'rest_output_link_wp_head');
        remove_filter('the_content_feed', 'wp_filter_content_tags');
    }
}
add_action('init', 'disable_gutenberg_preloading');
Fragment Caching for Dynamic Blocks
Cache individual dynamic blocks separately from the full page:
function cache_dynamic_block_content($block_content, $block) {
    if ($block['blockName'] === 'core/latest-posts') {
        $cache_key = 'latest_posts_' . md5(serialize($block['attrs']));
        $cached = get_transient($cache_key);

        if ($cached !== false) {
            return $cached;
        }

        // Cache for 1 hour
        set_transient($cache_key, $block_content, HOUR_IN_SECONDS);
    }

    return $block_content;
}
add_filter('render_block', 'cache_dynamic_block_content', 10, 2);
10. Monitoring and Testing
Performance is not static; it degrades without active maintenance. Continuous monitoring ensures your optimizations remain effective. Implement a monitoring schedule and stick to it, using data from real user metrics and testing tools to guide your optimization decisions. Regular performance testing requires the right tools to measure and understand your site’s behavior across different conditions and devices. Here are some essential testing tools you can use,
Google PageSpeed Insights
For speed testing, Google PageSpeed Insights remains the industry standard and provides scores for both mobile and desktop performance. This tool directly measures Core Web Vitals and offers specific recommendations for improvement. What makes PageSpeed Insights particularly valuable is that it uses real user data from Chrome’s field data along with lab-based testing, giving you both actual user experience metrics and controlled testing results.
GTmetrix
GTmetrix offers a complementary perspective with its detailed waterfall charts that visually show how your page loads resource by resource. These waterfall visualizations help identify bottlenecks like render-blocking resources, slow server response times, or oversized assets that delay the overall page load. GTmetrix also allows you to test from different geographic locations and simulated connection speeds, helping you understand how users in different situations experience your site.
WebPage Test
WebPageTest provides even more granular testing options, allowing you to test from multiple locations worldwide, on various devices, and under different network conditions. You can simulate slow 3G connections to see how your site performs for users with poor connectivity, or test from specific geographic regions where you have significant audiences. The filmstrip view shows your page loading frame-by-frame, making it easy to spot visual rendering issues.
Pingdom Tools
For uptime monitoring, Pingdom Tools goes beyond simple speed testing to track whether your site remains accessible. Downtime can devastate your SEO rankings and user trust, so monitoring uptime helps you catch and resolve issues before they significantly impact your visitors.
Google Search Console
On the SEO side, Google Search Console serves as your primary window into how Google sees your site. The performance tracking features show which queries drive traffic to your site, your average position in search results, and click-through rates. The Core Web Vitals report flags pages with poor performance metrics that may harm your rankings.
Screaming Frog
Screaming Frog provides comprehensive technical SEO audits by crawling your entire site, similar to how search engine bots do. It identifies broken links, missing meta tags, duplicate content, and structural issues that might hurt your search visibility. For Gutenberg sites specifically, Screaming Frog helps verify that your block-based content creates proper heading hierarchies and internal link structures.
Comprehensive SEO platforms like Ahrefs or SEMrush offer broader competitive analysis alongside technical audits. These tools help you understand your site’s performance relative to competitors, identify keyword opportunities, and track your search visibility over time. While these premium tools require significant investment, they provide insights that can drive substantial improvements in organic search traffic.
Set Up Performance Budgets
Performance budgets establish concrete, measurable targets that prevent your site from becoming slower over time as you add new features and content. Without explicit budgets, performance tends to degrade gradually through a thousand small decisions that each seem harmless individually.
👉 Define specific thresholds for your site’s key performance metrics and commit to staying within these limits. A reasonable page size budget caps total page weight at 1.5 megabytes, including all HTML, CSS, JavaScript, images, and other resources. While this might seem generous, many WordPress sites exceed this significantly, leading to slow load times, especially on mobile networks.
👉 Limiting HTTP requests to fewer than fifty helps ensure fast loading even when individual resources are well-optimized. Each request requires network overhead, DNS lookups, connection establishment and protocol negotiation, so reducing total requests improves performance even if individual files are small.
👉 Your Largest Contentful Paint should target under 2.5 seconds to achieve Google’s “good” threshold. This ensures the main content of your page becomes visible quickly, keeping visitors engaged. For First Input Delay and Interaction to Next Paint, aim for under 100 milliseconds and 200 milliseconds, respectively, to ensure responsive, snappy user interactions. Cumulative Layout Shift should stay under 0.1 to prevent jarring visual shifts that disrupt the reading experience.
Time to Interactive measures when your page becomes fully usable, with all interactive elements functional and responsive. Targeting under 3.5 seconds ensures visitors can begin engaging with your site quickly rather than waiting for slow JavaScript to finish executing.
Implement these budgets by testing against them regularly and refusing to deploy changes that push you over budget. If a new feature would exceed your performance budget, you must either optimize it further or remove something else to make room. This disciplined approach prevents the gradual performance degradation that affects most sites over time.
Regular Audit Schedule
Creating a systematic maintenance routine prevents performance degradation over time and helps you catch issues before they impact user experience or search rankings.
👉 Weekly, dedicate a few minutes to checking your Core Web Vitals in Google Search Console. The Core Web Vitals report shows trends over time, allowing you to spot degradation before it becomes severe. If you notice scores dropping, investigate recent changes to your site. For example, a new plugin, theme update, or content changes might be the culprit.
👉 Also check for 404 errors during your weekly review. Broken links frustrate users and waste search engine crawl budget. Most SEO plugins can monitor 404 errors automatically, making it easy to identify and fix broken links promptly.
👉 Monthly maintenance requires more thorough attention. Run complete speed tests on your most important pages using tools like PageSpeed Insights and GTmetrix.
👉 Test not just your homepage, but also high-traffic blog posts, service pages and conversion-focused landing pages. Each page type may have different performance characteristics based on the blocks and content it contains. This is also the time to clean your database using plugins like WP-Optimize or Advanced Database Cleaner. Remove old post revisions, spam comments and expired transients that accumulate over time.
👉 Update all plugins and themes, as updates often include performance improvements and security fixes. Finally, review any new content you have published during the month and ensure images are properly optimized and posts follow SEO best practices.
👉 Quarterly audits should be comprehensive. Conduct a full technical SEO audit using Screaming Frog to identify any structural issues, broken links, missing meta descriptions, or other technical problems.
👉 Review your image optimization across the entire site. Look for any oversized images that slipped through and opportunities to implement newer formats like WebP or AVIF.
👉 Analyze your plugin collection critically and remove any that you are not actively using. Every inactive plugin is still loading code and potentially creating security vulnerabilities.
👉Test your site thoroughly on various actual devices and browsers, not just in responsive design mode. Real-world testing often reveals issues that emulators miss, particularly related to touch interactions and mobile-specific rendering.
Plugin Recommendations to Enhance Your Gutenberg WordPress Site’s Performance

While manual optimization provides maximum control, performance plugins can streamline many optimization tasks and make ongoing maintenance more manageable. We have covered many manual optimizations. However, these plugins can streamline the process:
Performance Plugins
Start your optimization journey with the highest-impact changes: implement a quality caching solution, aggressively optimize all images, and streamline your asset loading by removing unnecessary block styles.
WP Rocket
WP Rocket stands out as the premium performance solution specifically designed for WordPress. What sets WP Rocket apart is its comprehensive approach to Gutenberg optimization combined with exceptional ease of use.
Key Features:
- Page caching with automatic cache preloading – Ensures cached versions of your pages are always ready for visitors
- CSS and JavaScript minification and combination – Reduces the number of browser requests
- Built-in lazy loading – Works seamlessly with Gutenberg’s Image and Gallery blocks, deferring offscreen images until users scroll near them
- Database optimization tools – Cleans up post revisions, spam comments, and transient options that accumulate in Gutenberg sites
- Simple CDN integration – Offload static assets to a content delivery network without complex configuration
LiteSpeed
For those running their sites on LiteSpeed servers, LiteSpeed Cache provides a completely free alternative that leverages server-level caching for exceptional performance. Server-level caching is inherently faster than PHP-based caching because it serves cached pages before WordPress even loads.
Key Features:
- Server-level caching – Serves cached pages before WordPress loads for maximum speed
- Image optimization – Automatic WebP conversion for better compression
- CSS and JavaScript minification – Reduces file sizes for faster loading
- Object caching – Optimizes database queries for improved performance
- Database optimization tools – Keep your database clean and efficient
- 100% free – No premium version required (requires LiteSpeed server)
Perfmatters
Perfmatters takes a different approach, focusing on disabling unnecessary WordPress features and managing script loading rather than providing caching. This lightweight plugin excels at reducing bloat by disabling features like emojis, embeds, and other WordPress defaults that many sites do not need.
Key Features:
- Script manager – Prevent specific scripts from loading on pages where they are not needed (especially valuable for Gutenberg sites).
- Disable unnecessary WordPress features – Remove emojis, embeds, and other defaults that create bloat.
- Selective script loading – Load contact form scripts only on pages with contact forms.
- Lightweight approach – Focuses on preventing unnecessary code rather than adding more features
- Works alongside caching plugins – Complements other performance solutions rather than replacing them
Image Optimization Plugins
Images typically account for the majority of page weight on modern websites, making image optimization plugins essential for performance. Invest time in proper image optimization and you will see dramatic performance improvements. Here are some solutions,
ShortPixel
ShortPixel offers both free and premium tiers, with the free plan providing 100 image compressions per month. The plugin’s standout feature is its intelligent compression, which automatically converts images to the WebP format, providing superior compression compared to traditional JPEG and PNG formats.
Key Features:
- Automatic WebP conversion – Superior compression compared to traditional JPEG and PNG formats.
- AVIF format support – Even better compression than WebP (browser support still growing).
- Adaptive images – Automatically serve different image sizes based on the visitor’s device, ensuring mobile users do not download desktop-sized images.
- Built-in CDN – Comprehensive image delivery solution included.
- Seamless Gutenberg integration – Automatically optimizes images as you upload them to the media library.
- Free tier available – 100 image compressions per month at no cost.
Imagify
Imagify, developed by the same team behind WP Rocket, follows a similar freemium model with particularly aggressive compression algorithms. Where Imagify excels is in bulk optimization. You can optimize your entire existing media library with just a few clicks.
Key Features:
- Bulk optimization – Optimize your entire existing media library in just a few clicks (invaluable for established sites with thousands of images)
- Three compression levels – Normal, aggressive, and ultra (aggressive provides the best balance for most users)
- WebP generation – Automatic conversion to modern image formats
- Resize-on-upload – Prevents oversized images from entering your media library in the first place
- Aggressive compression algorithms – Maximum file size reduction while maintaining visual quality
- Freemium model – Free tier available with premium options for high-volume sites
SEO Plugins
Comprehensive SEO plugins help ensure your Gutenberg content is properly structured and optimized for search engines. Some popularly used SEO plugins include,
Rank Math
Rank Math has rapidly gained popularity as a free SEO solution that rivals premium competitors in features. The plugin provides real-time content analysis as you write, suggesting improvements for keyword density, readability, and SEO best practices. For Gutenberg users, Rank Math’s schema markup capabilities are particularly valuable. It can automatically add structured data for FAQ blocks, How-To blocks, and review content, helping your pages appear in rich results on Google.
The built-in redirects manager helps you handle URL changes without losing search rankings, while the 404 monitor alerts you to broken links before they frustrate visitors or harm your SEO. Rank Math also tracks your internal linking automatically, showing you how many links point to each page and suggesting opportunities to improve your internal link structure.
Yoast SEO
Yoast SEO remains the most widely used WordPress SEO plugin, with both free and premium versions available. While its core features overlap with Rank Math, Yoast has been specifically optimized for the Gutenberg editor with a dedicated sidebar panel that integrates seamlessly into the block editor interface. The readability analysis goes beyond SEO to evaluate sentence length, paragraph structure and use of transition words. These are some factors that contribute to user engagement and, indirectly, to SEO performance.
Yoast automatically generates XML sitemaps that help search engines discover and index your content more efficiently. The breadcrumbs feature improves site navigation and provides additional opportunities for internal linking. For sites focused on social media traffic, Yoast’s social meta tag controls allow you to precisely control how your content appears when shared on Facebook, Twitter, and other platforms.
Common Gutenberg Performance Mistakes to Avoid
Optimizing a Gutenberg WordPress site for speed and SEO is not a one-time task but an ongoing commitment to performance. The block editor’s flexibility comes with responsibility; every block you add, every image you upload, and every plugin you install has performance implications that accumulate over time. Therefore, understanding what NOT to do is equally important:
Mistake #1: Installing Too Many Block Plugins: Each block plugin adds its own CSS and JavaScript, creating bloat. Use minimal, well-coded block plugins or stick with core blocks and custom CSS styling.
Mistake #2: Not Optimizing Reusable Blocks: Reusable blocks can contain heavy content that loads on multiple pages. Keep reusable blocks lightweight and audit them regularly for optimization opportunities.
Mistake #3: Ignoring Block CSS Specificity: Multiple sources of CSS for blocks can conflict and create specificity issues, requiring additional overrides. Use a systematic approach to block styling and minimize CSS specificity battles.
Mistake #4: Using Too Many Dynamic Blocks: Dynamic blocks (those that render content server-side) create additional database queries. Balance dynamic and static blocks, and implement caching for dynamic content.
Mistake #5: Not Testing on Real Devices: Emulators and responsive design modes don’t always reflect real-world performance. Test on actual mobile devices, tablets, and various browsers regularly.
The most important principles to carry forward from this guide are selectivity and intentionality with your block usage. Resist the temptation to add every interesting block or feature. Use only what genuinely serves your content and audience. Also, comprehensive caching at multiple levels, such as page caching, object caching, and browser caching, reduces the processing burden on your server and speeds delivery to visitors.
With mobile-first indexing now standard, prioritize mobile performance in all your optimization efforts, as mobile users likely represent the majority of your audience. Structure your content with proper heading hierarchies and strategic internal linking to help search engines understand and rank your content effectively. Finally, make all optimization decisions based on data from testing tools and user metrics rather than assumptions or guesses.
Start to Optimize Your Gutenberg WordPress Sites for Speed And SEO
By systematically implementing the strategies outlined in this guide, you will achieve measurable improvements across multiple dimensions of site performance. The enhanced user experience leads to longer session durations, lower bounce rates, and ultimately higher conversion rates, whether you are selling products, building an email list, or simply sharing information. Additionally, optimized sites consume fewer server resources, which can reduce hosting costs and improve site stability during traffic spikes.
Was this blog helpful? Let us know in our Facebook Community. For more web design-related tips and tricks, subscribe to our blog.