Online shopping is growing every day. More people want to buy things from the comfort of their homes. This means the demand for online stores is higher than ever. If you want to sell products like clothes or gadgets, now is the perfect time to start. However, building a store can seem daunting, especially if you are new to this. You might not have the time or skills to design everything from scratch. That is why ready-made templates are so helpful. They make it easy to create a WooCommerce store without stress.
In this blog, you will learn a simple five-step process to set up your store. We will use multipurpose templates to keep things quick and smooth. By the end, you will know how to create a WooCommerce store that looks professional and works well.
Let us dive in and learn how you can do this. This introduction sets the stage for an easy guide. Also, it demonstrates why templates are a game-changer for beginners and busy entrepreneurs.
Step 1: Choose the Right Hosting & Install WordPress
Before you start to sell anything, you need a strong base for your website. This starts with picking the right hosting provider and setting up WordPress. So now we will know the first step to creating your WooCommerce store – choosing the right hosting.
A good hosting provider keeps your WooCommerce store running smoothly, handling products, images, and customer visits. Slow or unreliable hosting can drive customers away, so choose one that scales with your business. xCloud is a trusted option, ideal for beginners and pros, built for eCommerce traffic.
Next, install WordPress, the platform for WooCommerce. Most hosts offer one-click installs: login, find WordPress in your dashboard, click install and follow the steps. It takes just minutes. Let us follow the installation process:
How to Install WordPress with xCloud?
WordPress Multisite offers a great solution for WordPress users looking to manage multiple websites effortlessly. With Multisite, you can operate numerous websites using just one dashboard, eliminating the need for separate WordPress installations.
Today, we will guide you through the step-by-step process of installing WordPress multisite with xCloud hosting. Follow along as we simplify the setup for you.
Method 1: Activate WordPress Multisite
To activate WordPress multisite when setting up a new site on xCloud, start by logging in to your xCloud account. Next, navigate to the “All Servers” page and select “Install A New WordPress Site”. Make sure to give a “Site Title” on the site creation page.
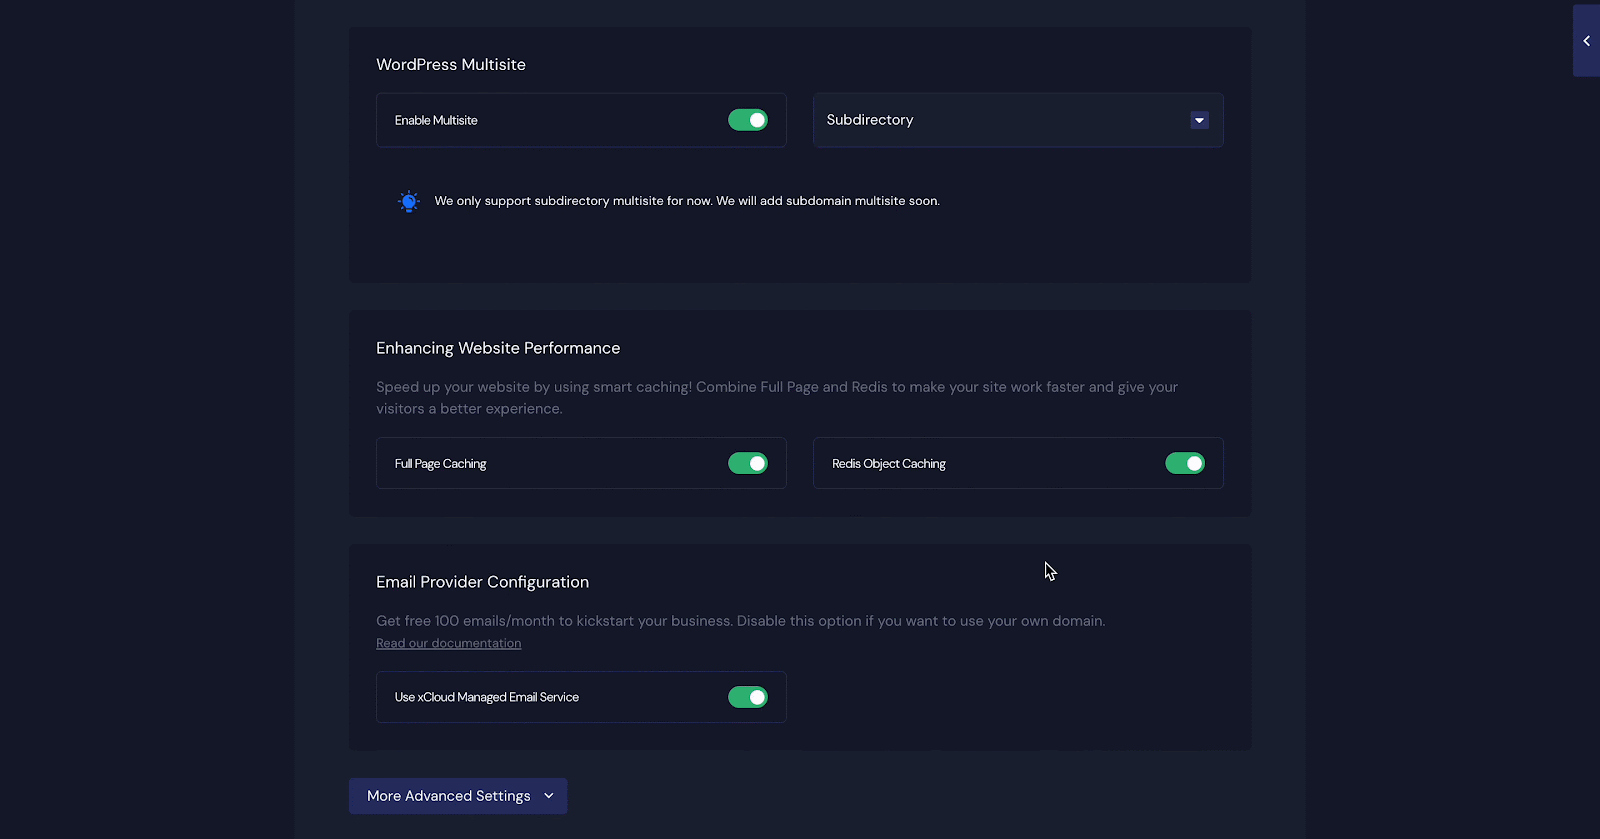
Scroll down a bit more, and you will find the WordPress multisite tab. Just toggle the option to enable it
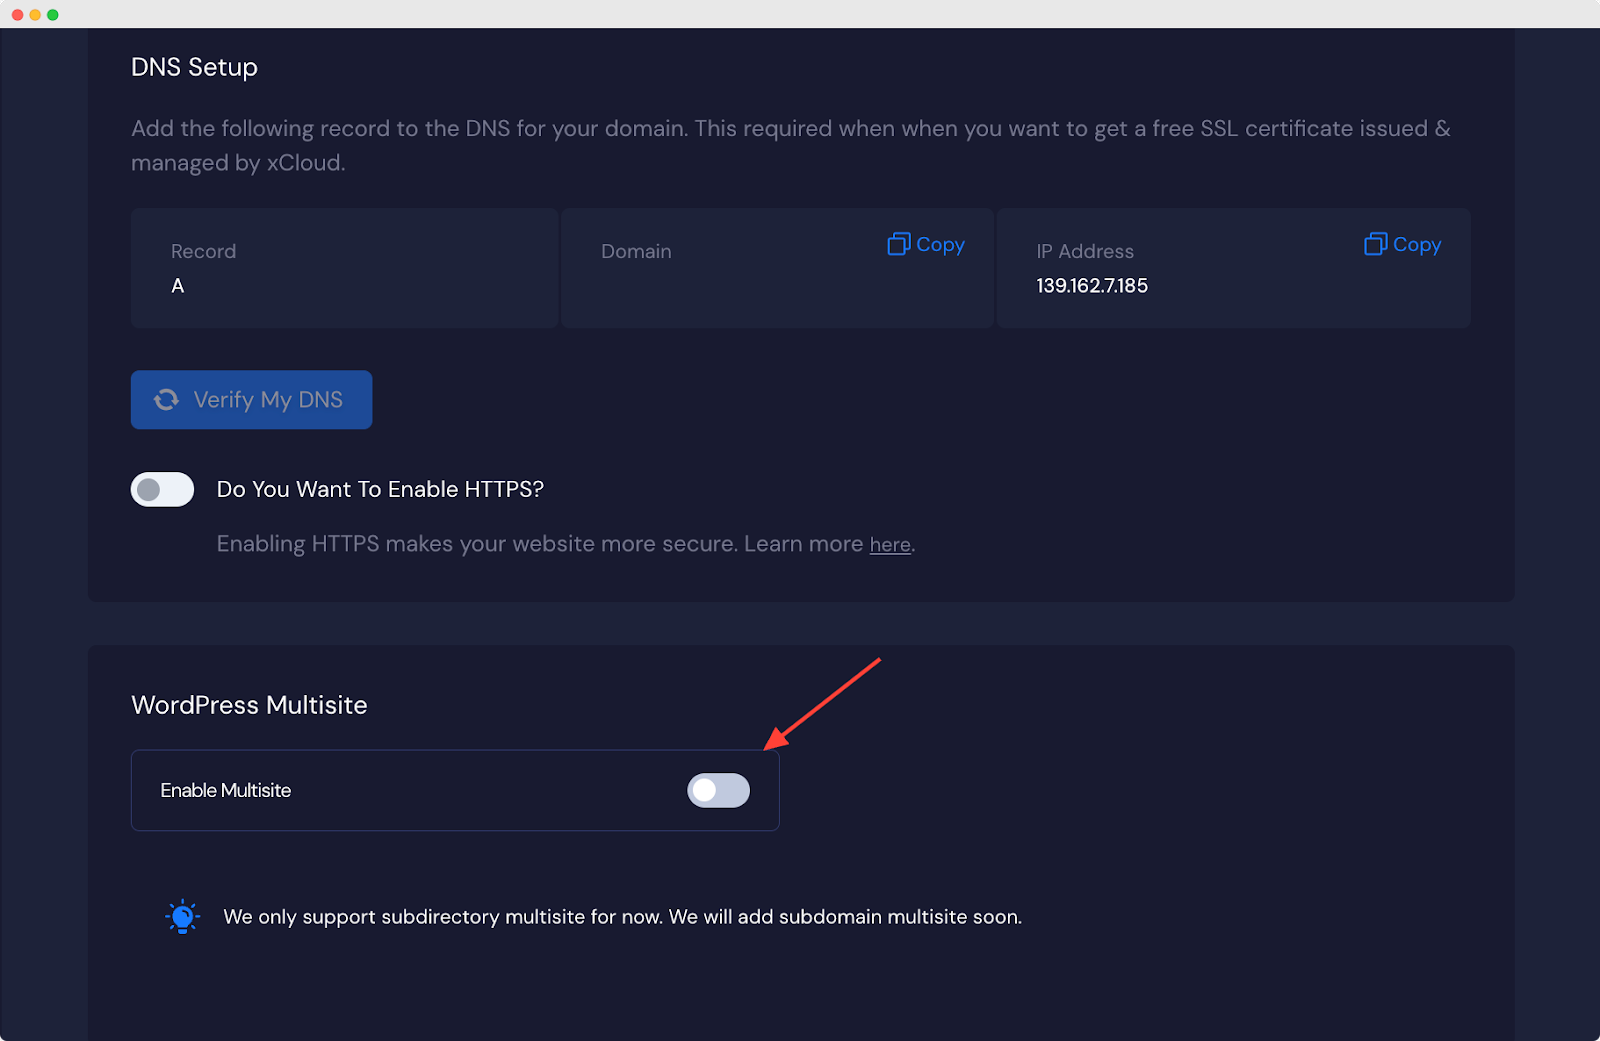
Note: you can create the multisite with both sub-domain and sub-directory.
After adding all the necessary information, click on the ‘Next’ button & your site will be created soon.
Step 2: Add a New Site from WordPress Dashboard
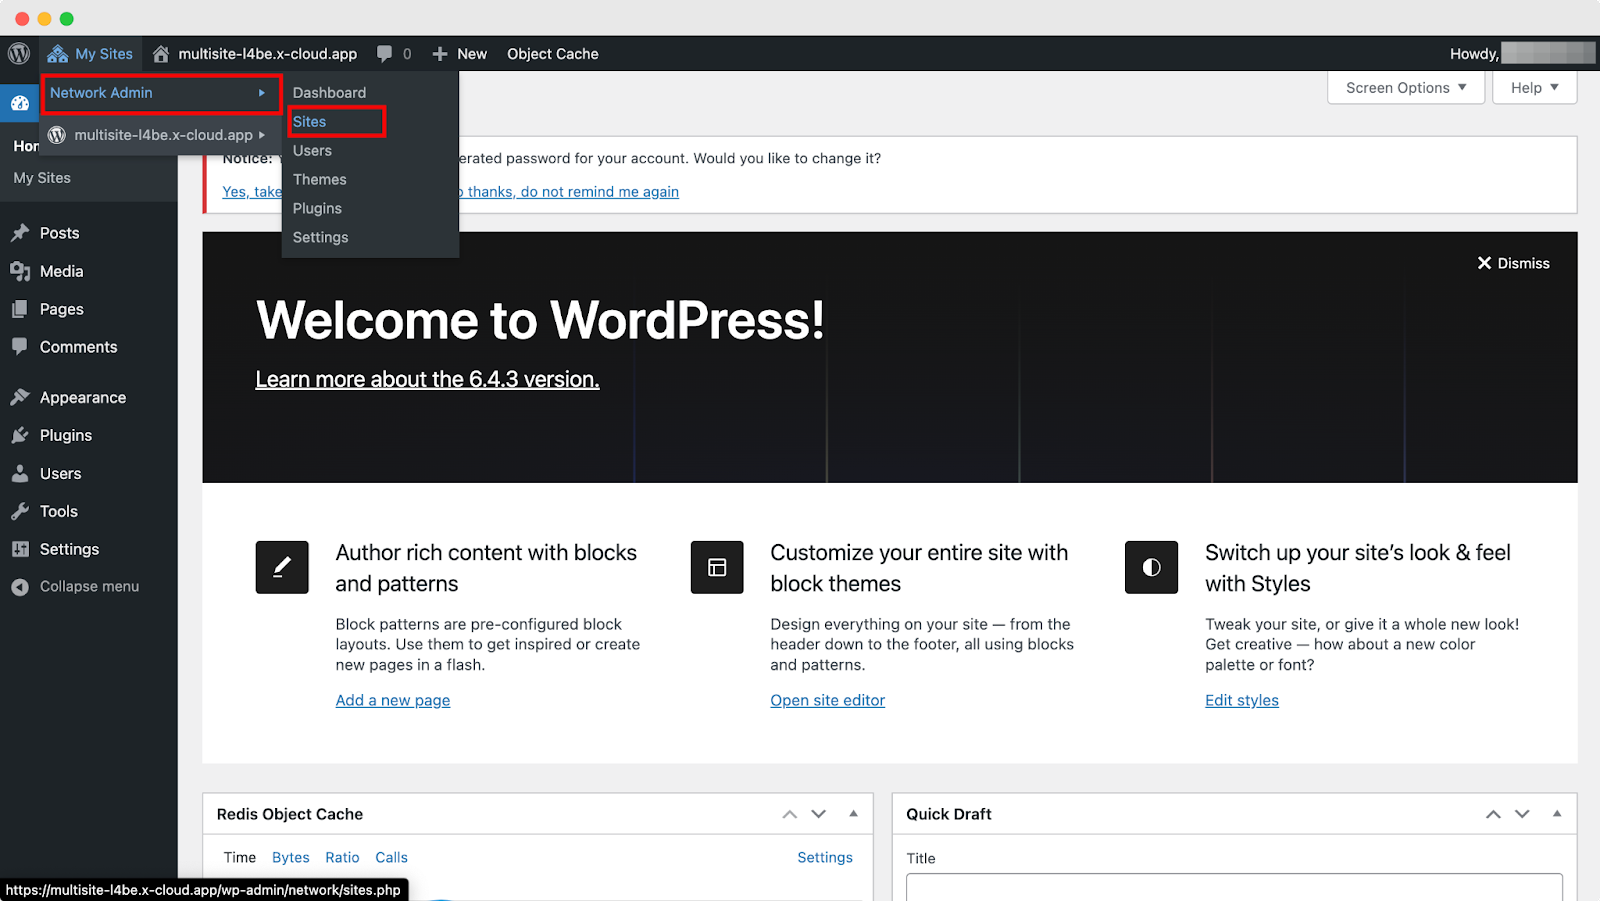
Next, you will need to log in to your WordPress site from xCloud.
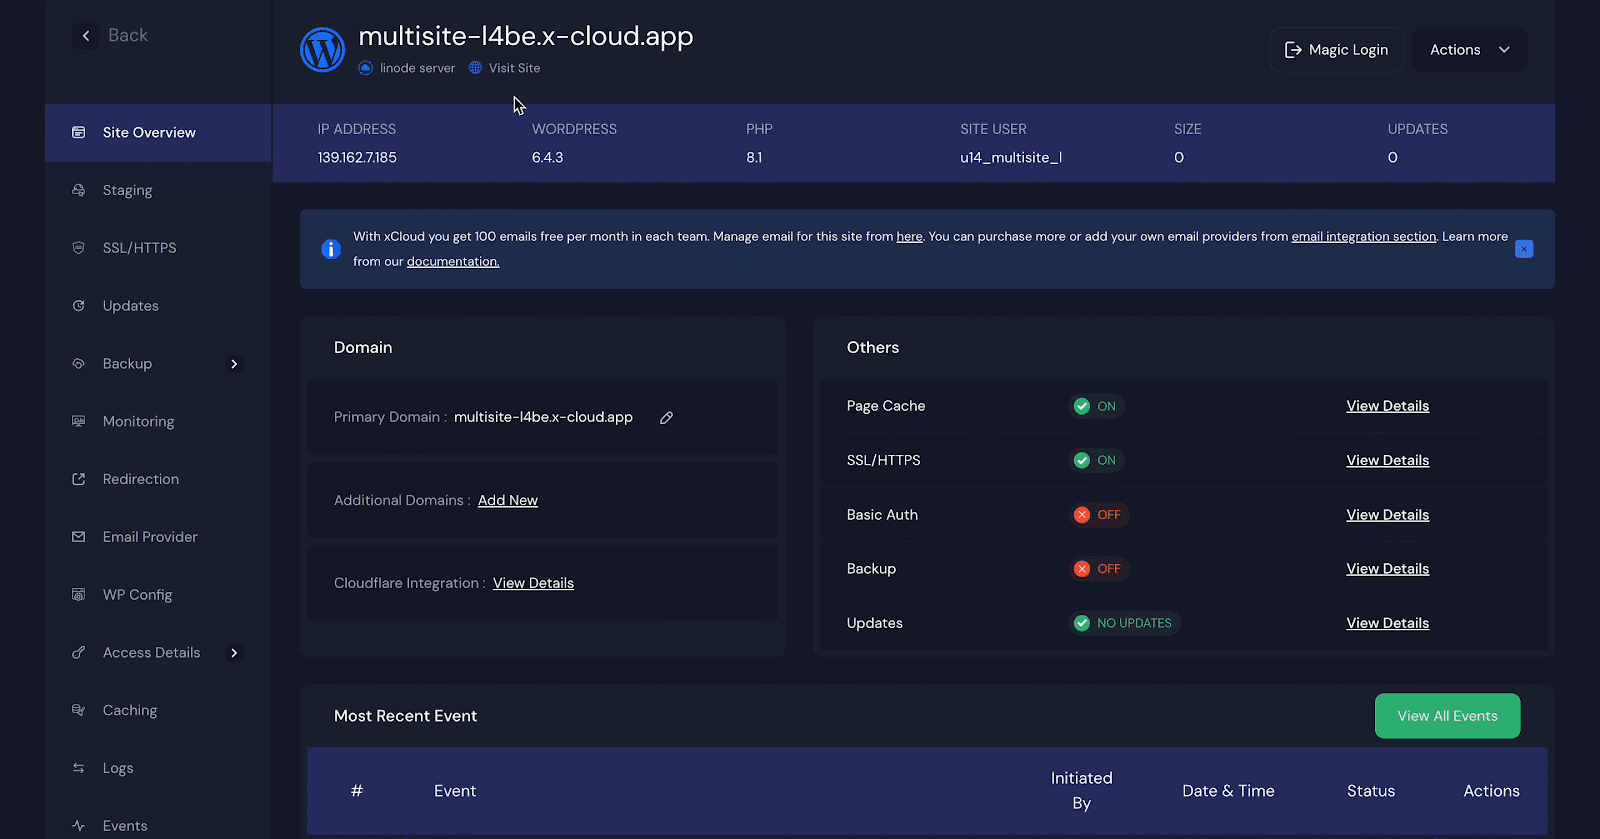
We will now create a new site from the dashboard. Navigate to My Sites → Network Admin → Sites.
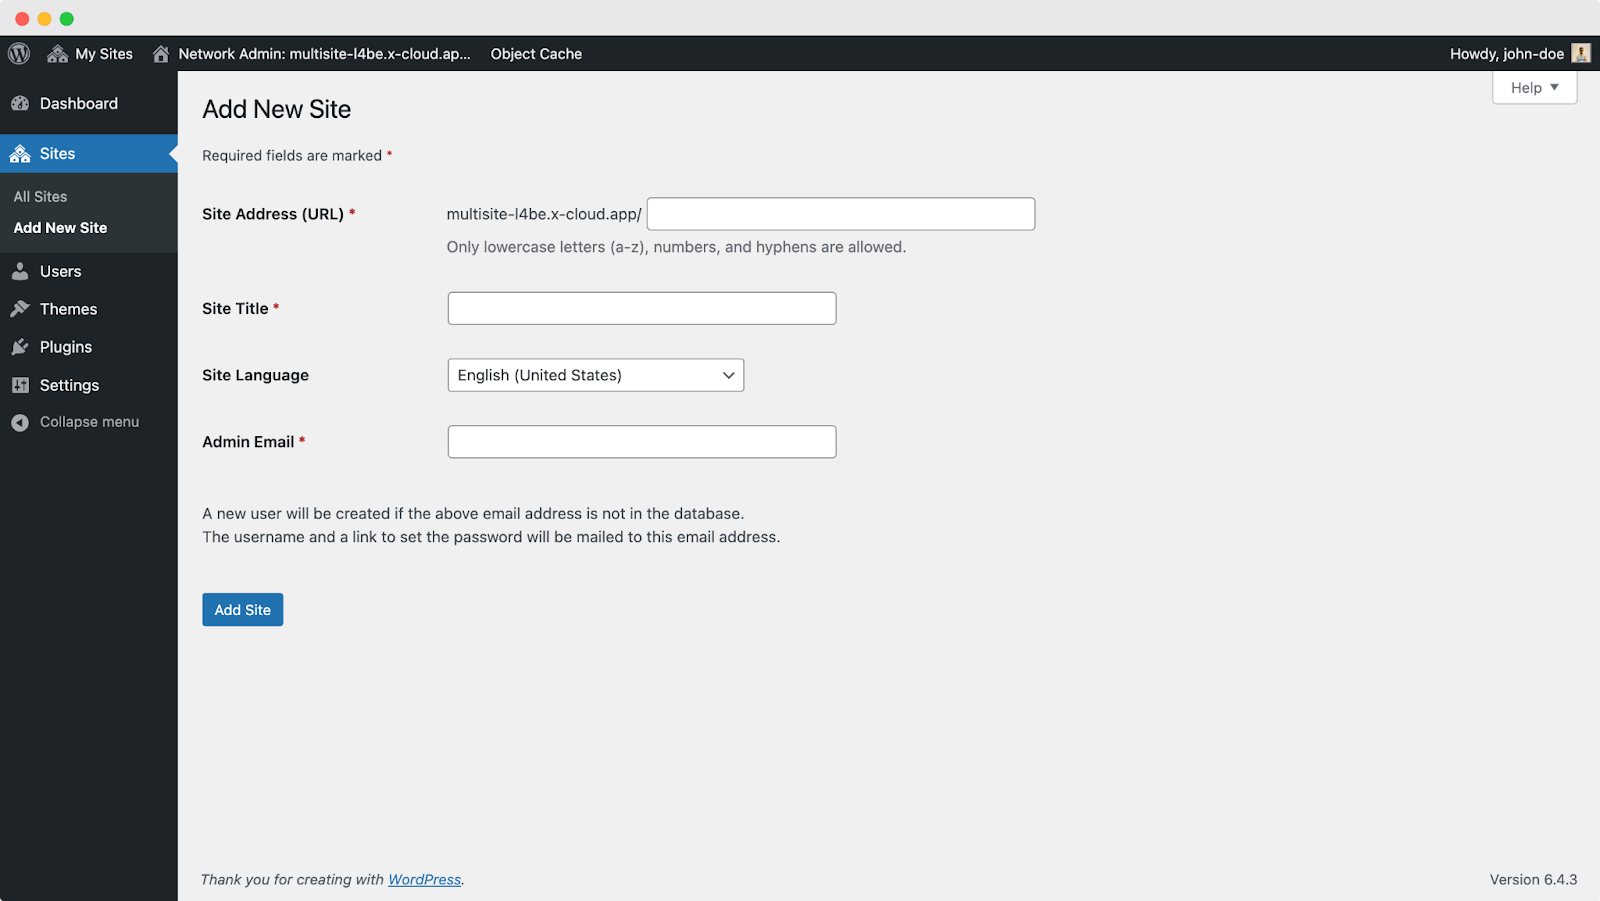
To add a new site, simply click on “Add New Site” from the Sites page. Then, enter your site address, title, language and admin email
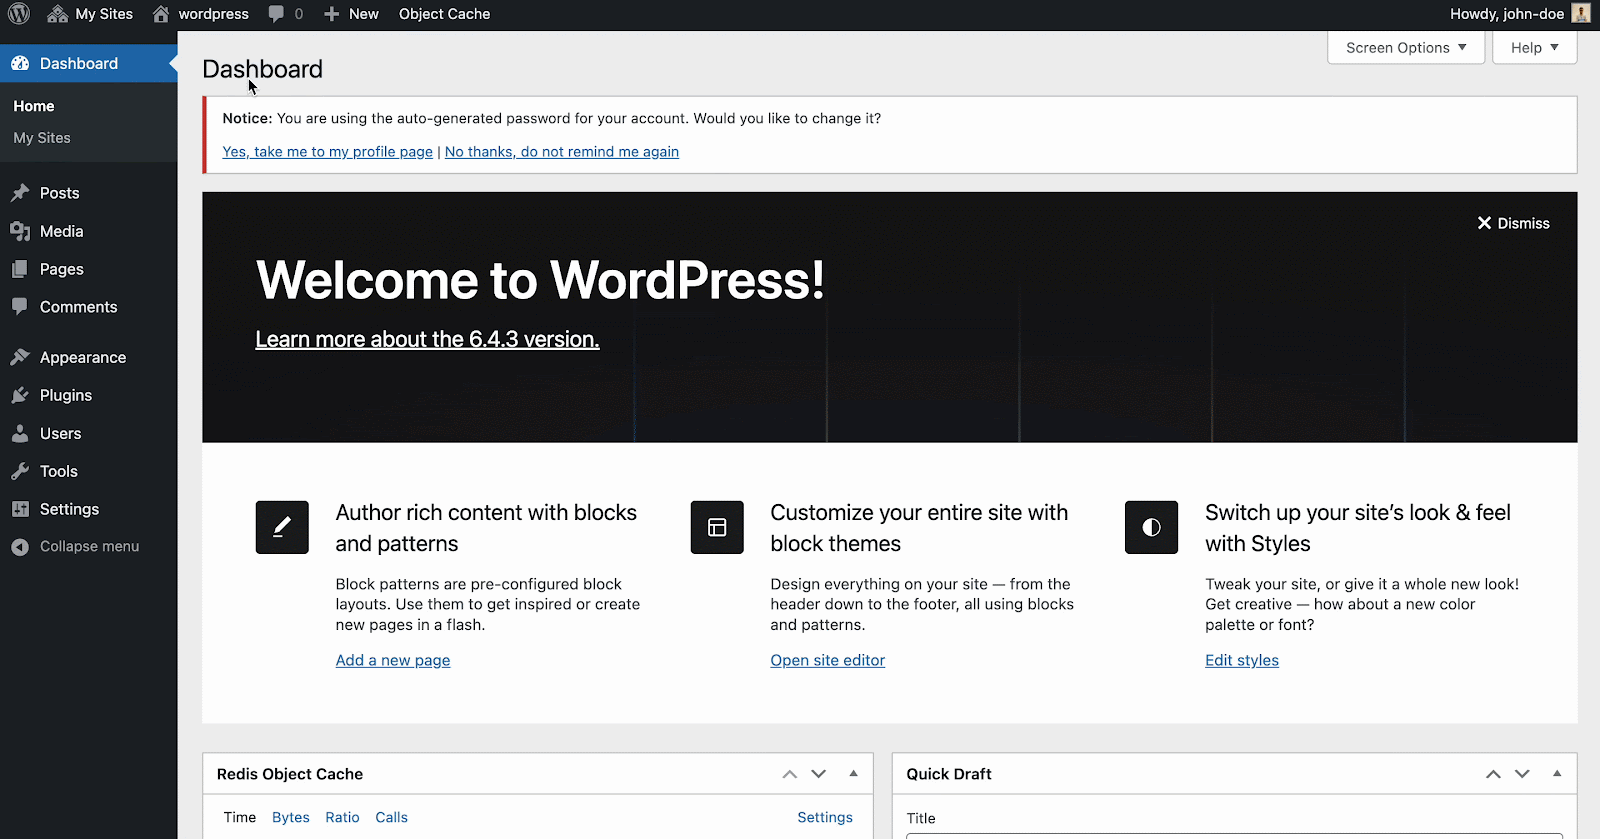
Once you have clicked on “Add Site” your newly created site will appear on the WordPress dashboard instantly. For this tutorial, we have named the newly added site “WordPress.” Click on the site and it will take you to your original domain.
That’s how you can easily create and configure a WordPress Multisite using xCloud. If you need any assistance, feel free to reach out to the xCloud Support Team.
Step 2: Install the WooCommerce Plugin
Let us take a look at the next step in building your store. Now that WordPress is ready, you need to add WooCommerce. This plugin turns your site into an online shop. It is popular because it is flexible and easy to use.
Installation via WordPress Admin
To install the WooCommerce plugin, go to the Plugins section in your WordPress dashboard and click on ‘Add New Plugin’. In the search bar, type ‘WooCommerce’ to find the plugin. Once it appears, select ‘Install Now’ to download it. After installation, click ‘Activate Now’ to enable the plugin and you will be ready to start the WooCommerce Setup Wizard.

WooCommerce Setup Wizard
Then WooCommerce is activated for the first time, the WooCommerce Setup Wizard will be the next screen you see after clicking “Activate”.
This helps you set up and configure your site with WooCommerce functionality. For a full walkthrough of the Setup Wizard (also known as the Onboarding Wizard), please read through the WooCommerce Setup Wizard documentation.
Step 3: Pick a Multipurpose Template or Starter Pack
In this section, you will learn how to choose a template for your store. Templates are a big part of making your WooCommerce setup fast and good-looking.
Multipurpose WooCommerce templates are pre-made designs for your store. They include pages like the homepage, product pages and checkout. You can use them for many types of businesses. Whether you sell fashion or tech, these templates work. They save time because you do not need to build everything yourself.
You can find great templates in a few places. Templately is one of them. It offers good options like the OneStopShop – Multipurpose WooCommerce Template. Picking a template, think about a few things:
1️⃣ First, check the design. Does it fit your brand?
2️⃣ Next, look at speed. A slow template can push customers away. Make sure it has the features you need, like product filters.
3️⃣ Finally, see if it matches your niche. A multipurpose template can work for any store with some tweaks.
Choosing the Right WooCommerce Templates for Your Store
Picking the perfect template for your WooCommerce store can make or break your online success. A great template saves time, looks professional, and turns visitors into customers. Let us explore five amazing options from Templately that suit different needs and spark excitement for your eCommerce journey.
Let us start with OneStopShop for Elementor. This multipurpose pack offers 13 ready-to-use pages, perfect for any store, from fashion to tech. Its compatibility with Elementor builder lets you tweak every detail, ensuring a conversion-focused design that shines on all devices.
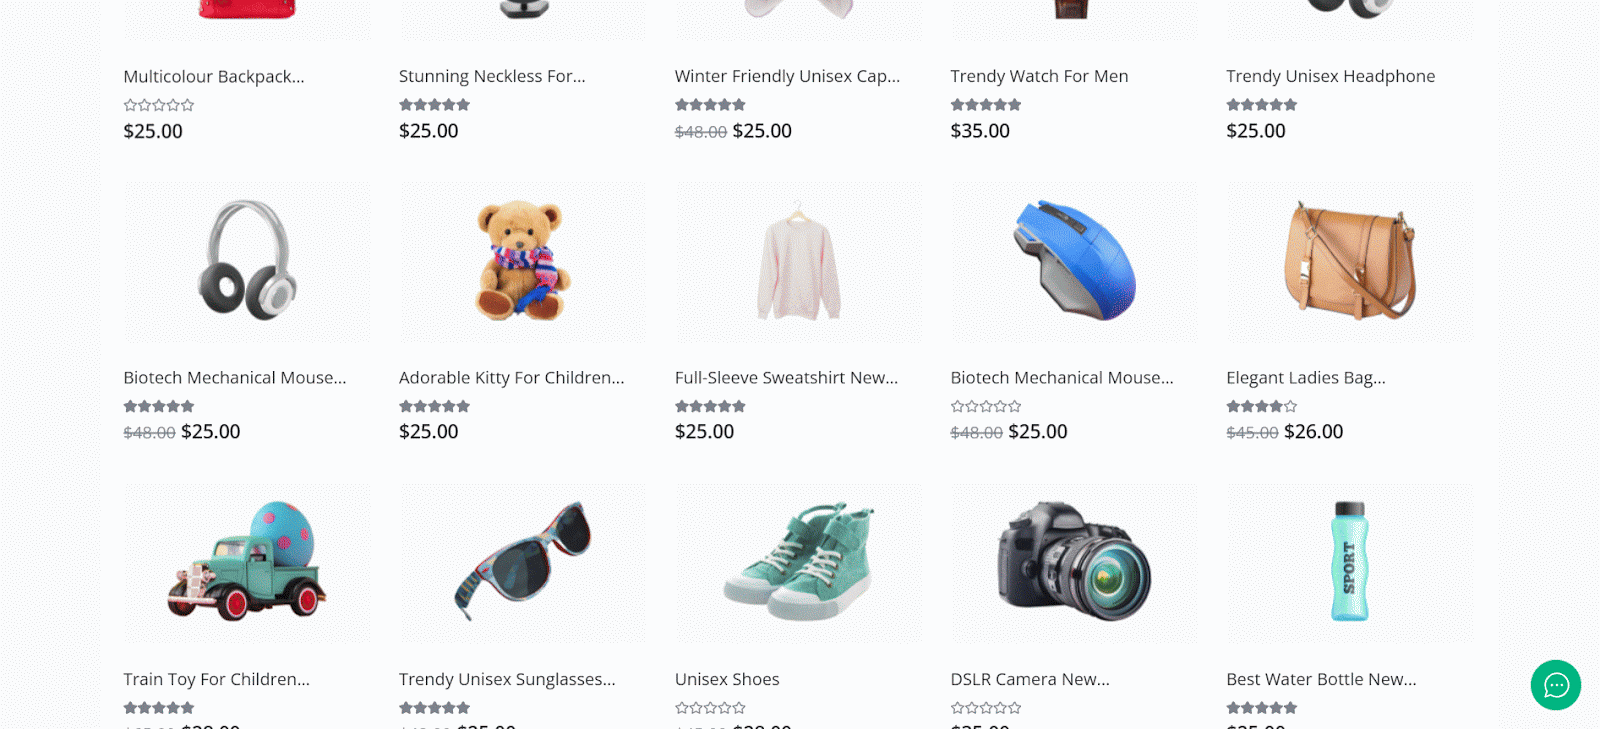
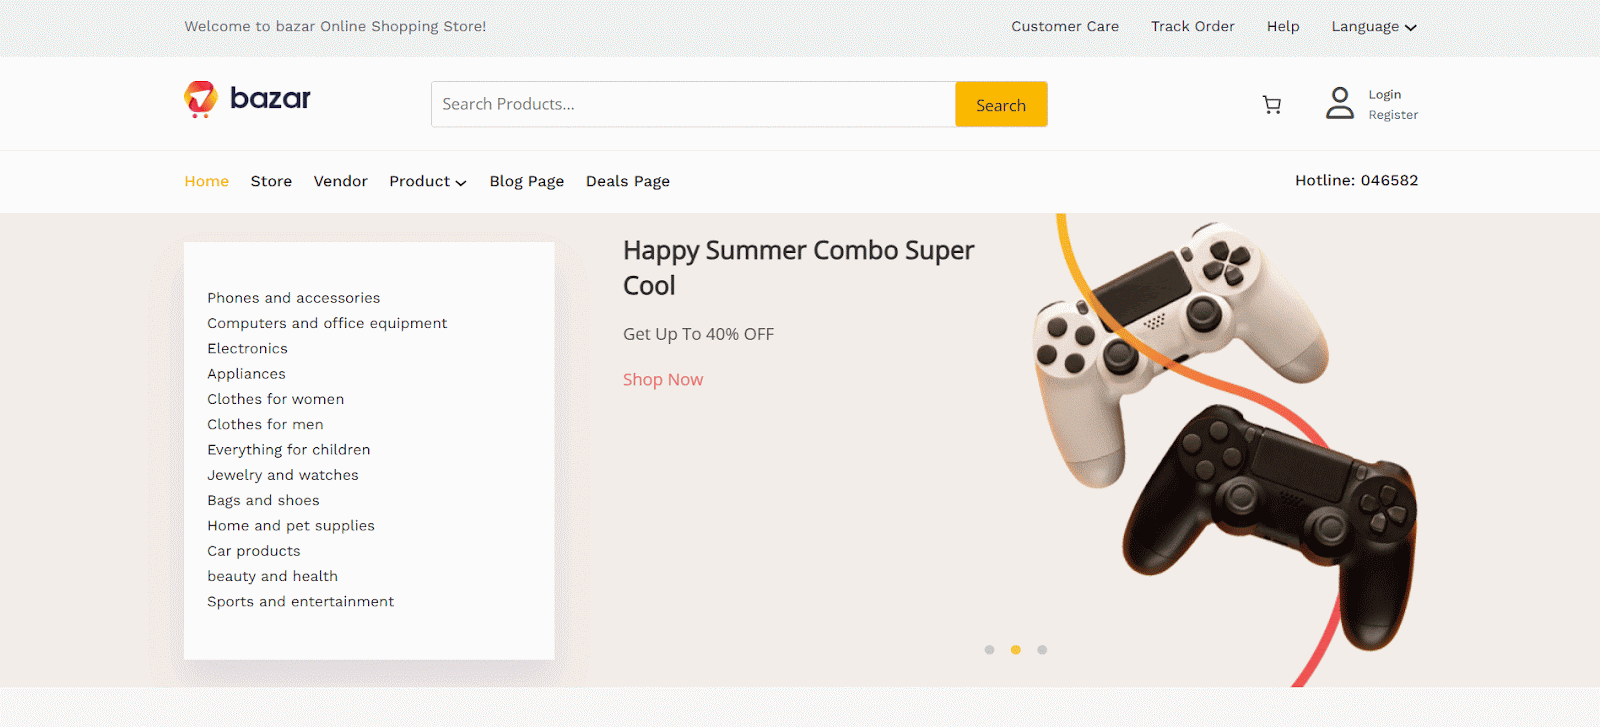
For a multi-vendor marketplace, try Bazar. With 11 dynamic pages, it is ideal for selling diverse products like jewelry or groceries. It has compatibility with both Elementor and Gutenberg, making customization easy which delivers a seamless shopping experience.
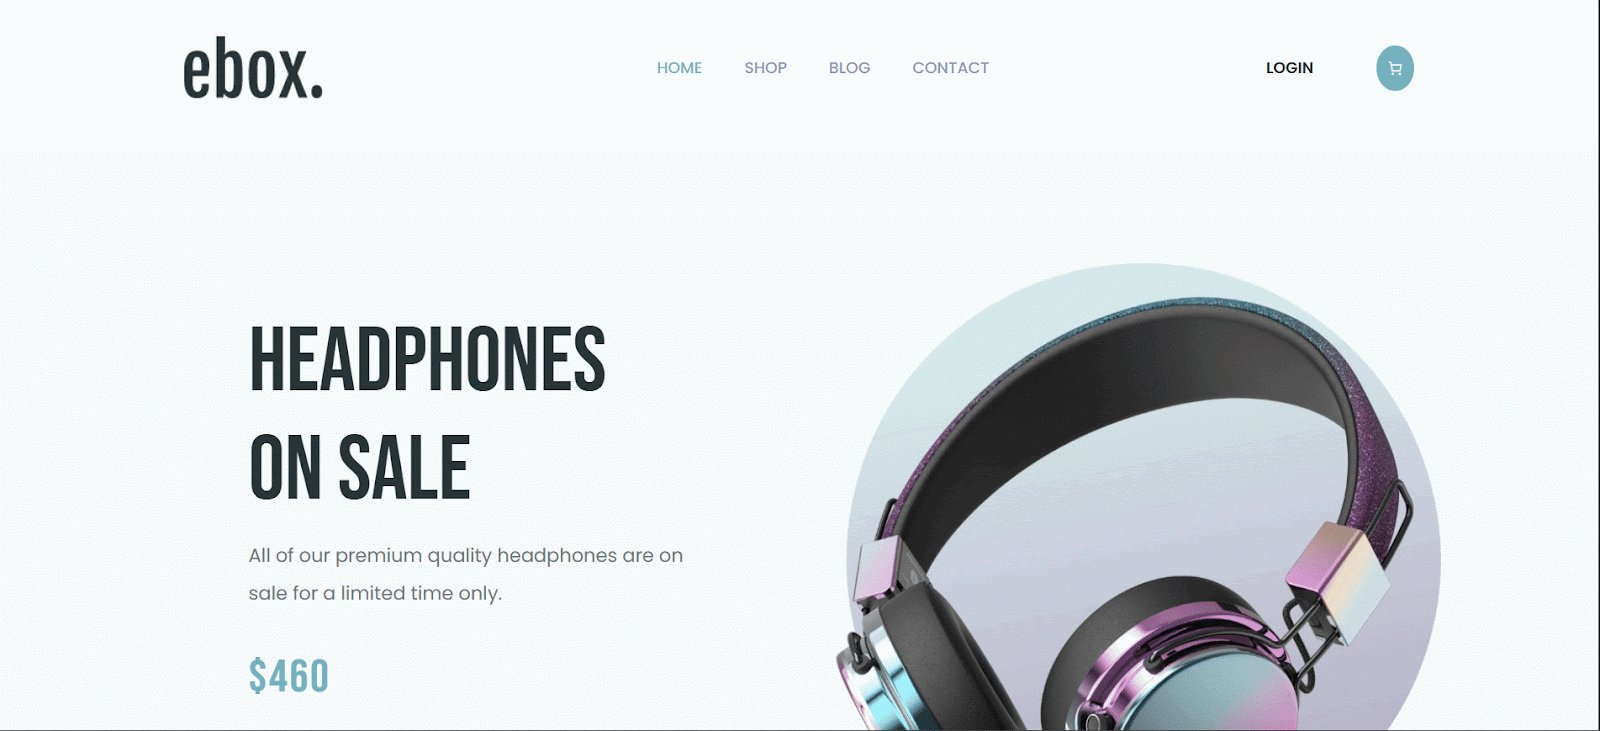
If you want a sleek, modern vibe, eBox is your go-to. Its clean design and responsive pages make it great for tech or lifestyle stores. This template works seamlessly with both Elementor and Gutenberg, so you can design your site using whichever you prefer.
For eco-friendly businesses, the GreenZone for WooCommerce template is a great choice. It features an earthy, modern design with engaging product pages and compelling CTAs — perfect for sustainable brands that want to stand out.
Even better, this template is also available for both Elementor and Gutenberg, giving you the flexibility to build with your preferred page builder and block editor.

Finally, Flower Shop for WooCommerce is a charming choice for floral businesses, available for Elementor and Gutenberg. Its vibrant design and mobile-friendly layout make it easy to showcase bouquets and drive sales.

Each template is responsive, customizable, and built for conversions. Choose one that matches your brand and start your store today. . Find the perfect templates and start your business hassle-free in no time.
Step 4: Customize Your Template with Drag & Drop Builders
Now we will explore how to personalize your WooCommerce store using drag-and-drop builders. Customizing your template is straightforward and lets you create a store that reflects your brand without any coding skills.
Drag-and-drop builders make website design easy and fun. They allow you to move elements, edit text and update visuals by simply dragging them into place. Two powerful tools stand out:
1️⃣ Essential Addons for Elementor &
Use Essential Addons for Elementor to add over 12 WooCommerce-specific widgets, like product grids or checkout forms, to make your product pages engaging and clear.

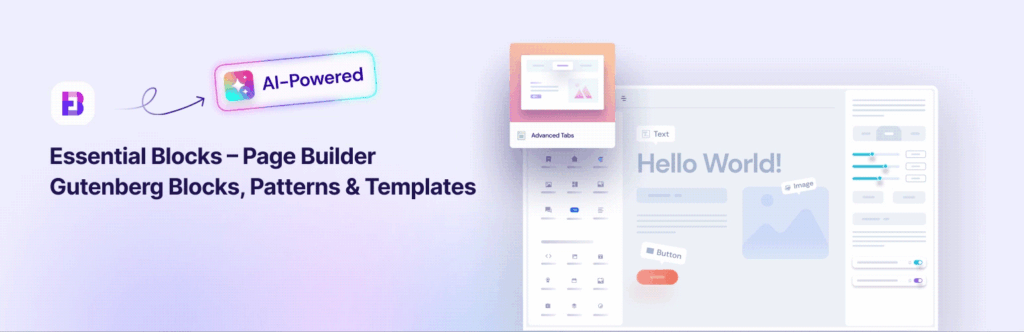
2️⃣ Essential Blocks for Gutenberg
With Essential Blocks for Gutenberg, you can use advanced blocks to create interactive product displays or call-to-action buttons like “Add to Cart” that guide customers to shop easily.
These two plugins boost your ability to customize WooCommerce templates with tailored widgets and blocks. Focus on key store sections to boost sales. Install your builder, like Elementor or Gutenberg, which integrates seamlessly with Templately templates. Import a template like OneStopShop with one click. Open the builder in WordPress, then swap the logo, update homepage text, add high-quality product photos and adjust colors to match your brand. Here are tips to ensure your store stands out:
- Use consistent fonts and colors for a professional look.
- Ensure mobile responsiveness, as most shoppers use phones;
- Essential Addons and Essential Blocks keep your store device-friendly.
- Add high-resolution product images for clarity and trust.
- Include CTAs like “Shop Now” with widgets or blocks to boost conversions.
Customizing with these tools is intuitive and empowering. Essential Addons for Elementor offers over 100+ elements for creative control, while Essential Blocks for Gutenberg provides 60+ modular blocks to keep your site fast and responsive.
Step 5: Add Essential Plugins & Launch Your Store
Let us take a look at the final step to get your store live. Adding plugins and testing everything makes your store ready for customers.
Plugins add extra power to your WooCommerce store. They help with things like search rankings and security. Here are some key plugins to add:
📈 Rank Math helps your store show up on Google.
🔒 Wordfence keeps it safe from hackers.
⚡ Test the speed with tools like Google PageSpeed Insights.
📊 Google Analytics tracks how people use your site.
⭐ A review plugin like Trustpilot lets customers leave feedback.
🔗 BetterLinks creates short, trackable URLs to boost your store’s marketing campaigns.
📢 NotificationX shows real-time sales popups to build trust and drive purchases.
📅 SchedulePress automates product announcements for consistent audience engagement.
🎥 EmbedPress adds engaging videos to product pages to increase customer interest.
These tools make your store better and safer. Before launching, test your store. Check if it works on phones and computers. Try the checkout to make sure it is smooth. Fix anything that does not work right. When everything is ready, publish your store.
Create a WooCommerce Store That Shines with Easy Steps
Creating a WooCommerce store is simple with this guide. You learned five steps to get it done. First, pick hosting and install WordPress. Then, add the WooCommerce plugin. Next, choose a multipurpose template. After that, customize it with builders. Finally, add plugins and launch your store. Ready-made templates make this fast and easy. They help beginners and busy people get a great store quickly. Now that you know how to create a WooCommerce store in 5 steps, You can start in no time and build your online business.
If you found this blog helpful, join our community to stay updated with the latest articles, product reviews and WordPress solutions. Subscribe to our blog for detailed tutorials, helpful tips and the latest updates with insightful blogs and reviews.
FAQs: Frequently Asked Questions about Multipurpose WooCommerce
Can I switch templates later without losing content?
Yes, you can change templates later. Your products and pages usually stay safe. You might need to fix menus or layouts after switching.
Are multipurpose templates good for niche-specific products?
Yes, they work for any niche. You can customize them to fit specific products like art or tech.
How do I make my WooCommerce store multilingual?
Use plugins like WPML. They let you add languages so customers worldwide can shop.
These answers help with common questions. They make your WooCommerce journey smoother.